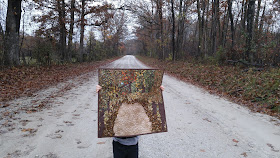
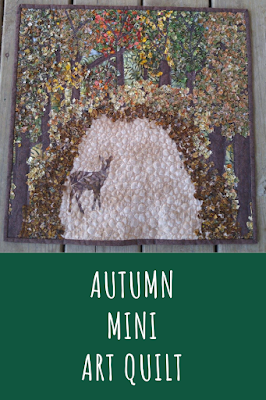
I took a photo in the fall of the road on the way to our house, and I wanted to try to recreate it in quilt form!
This post contains affiliate links. As an Amazon Associate I earn from qualifying purchases.
If you're new here, hello! I'm Laura! I design quilt patterns, and I'm a self-proclaimed deal hunter! Be sure to join the popular Quilting & Sewing Deals Facebook group where I post sales, deals, and coupon codes from all around the web!
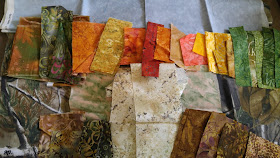
A quick dig through my stash yielded some great fabrics that would work for leaves!
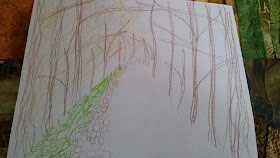
I quickly sketched out what I wanted to do, and just dove in!
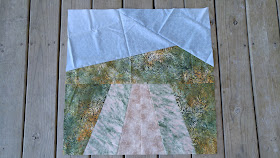
I sewed some fabrics together to be the background. I originally cut trees out of some RealTree Camo fabric, but I didn't like the way they looked, so I scrapped them.
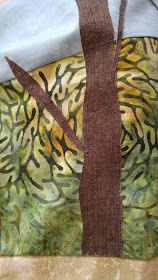
Instead, I cut tree and limb shapes out of brown fabric and top stitched them to the background with dark brown thread. I sewed over them many times so the stitches would mimic tree bark.
Then
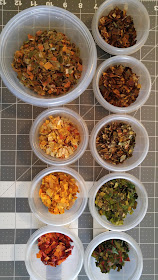
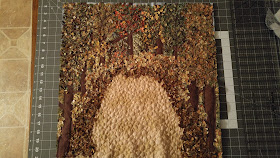
I used a rotary cutter to cut batik fabrics into 1/4” squares to make “leaves.” I
kept the different colors sorted in small plastic cups. Using my darning foot,
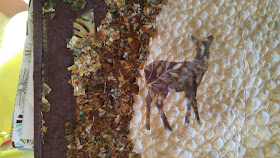
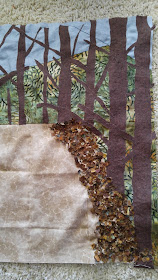
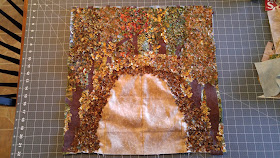
I sprinkled some “leaves” on the quilt and quilted over them to hold them in
place.
I did this just to the quilt top (no batting or backing fabric), using small swirls to stitch over the confetti-like pieces just as if I was free-motion quilting.
I free-motion quilted a pebble design onto the road, stitched along the sides of all the trees, and added just a bit of quilted swirls among the trees.
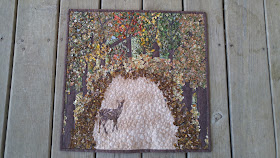
The quilt finished around 18" square. After completing the quilt, I felt like it needed something
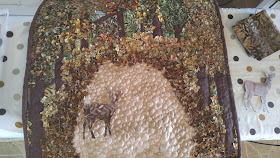
more, but couldn’t put my finger on it. While working on the quilt, several deer kept frequenting our yard. I decided the quilt needed a deer added!
The day after completely finishing the quilt, I cut out a deer silhouette and ironed it onto the road using Heat-N-Bond.
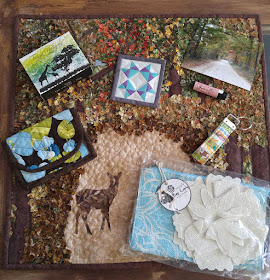
I mailed the quilt along with some extras (including the mini mini quilt) to Florida!
I hope the recipient enjoys this quilty peek into the country life in Missouri!


No comments:
Post a Comment
Thank you for visiting and for your comments! I try to reply to comments via email, so if you're expecting a response and don't hear from me, check if you're a no-reply blogger. Happy sewing!