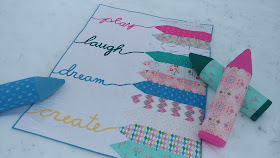
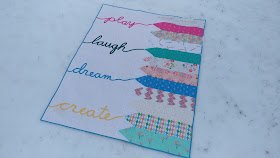
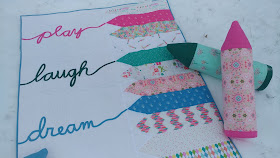
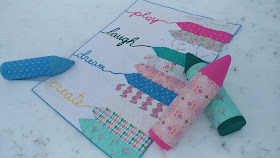
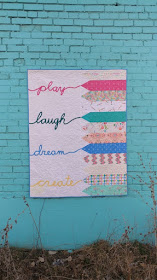
Mathew Boudreaux, aka Mister Domestic, just released his fourth fabric collection with Art Gallery Fabrics called Playroom! I am so excited to share with you the quilt I made for the party!! In case you missed it, I shared the very fun crayon pillows in the Lookbook a couple months ago! You can find the tutorial to make those on my blog HERE!!
This post contains affiliate links. As an Amazon Associate I earn from qualifying purchases.
If you're new here, hello! I'm Laura! I design quilt patterns, and I'm a self-proclaimed deal hunter! Be sure to join the popular Quilting & Sewing Deals Facebook group where I post sales, deals, and coupon codes from all around the web!
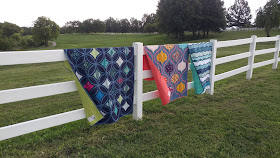
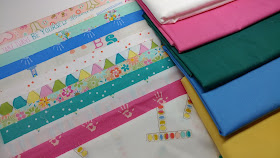
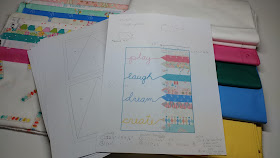
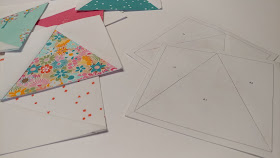
I have made a quilt with all of Mathew's collections so far! The first was Moonrise using his Loved to Pieces collection, the second was Finial using the Aura collection, and the third was High Tide using his Catch & Release collection.
All three of those quilts used bias tape, so I *knew* I just had to continue that theme with Playroom!
The quilt started with a fat eighth of each of the prints in the collection, as well as 1/2 yard cuts of AGF Pure Elements solids in colors Raspberry Rose, Zambia Stone, Parisian Blue, and Banana Cream. I used 2 yards of AGF solid white for the background and 2 yards of AGF solid Banana Cream for the back!
After a bit of quilty math, I was ready to get started!
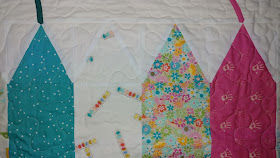
I drew a quick foundation piecing template in EQ8 for the crayon tips, and got to work! (In hindsight, I think I would like it better if the crayons had a flat tip. I'm sharing both templates with you so you can pick which one you'd like! (Links to templates are at the bottom of this blog post!)
I also cut two 3/4" wide bias strips from each solid fabric and made 1/4" wide bias tape.
After all the crayons were pieced and the top was finished, I pin basted it with Warm & Natural batting and the Banana Cream back.
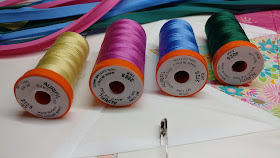
I chose four 50wt Aurifil thread colors from my stash that matched the AGF Pure Elements solids as closely as I could, and set out to add some words to the quilt! (The Aurifil colors I used are #2125 Wheat, #2588 Light Magenta, #2725 Light Wedgewood, and #4026 Dark Green.)
Now, this next part was fun, but definitely not for the faint of heart! If you've never used bias tape before, I wouldn't recommend this to be your first attempt. It's fiddly and can be frustrating. But some patience and perseverance prevailed, and I love the end result!!
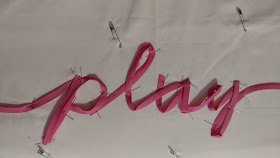
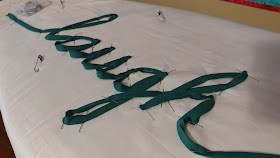
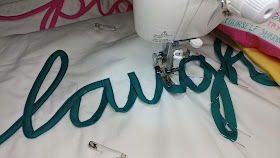
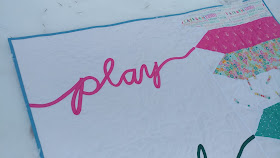
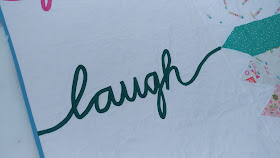
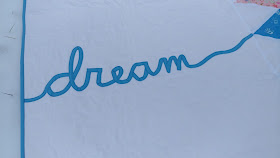
I used my air erasable pen to draw a horizontal line where I wanted the bottom of the word to be. Then very carefully, I pinned and pressed and finessed the bias tape into cursive words. I only did one at a time, and used a LOT of pins to hold the letters exactly where I wanted them.
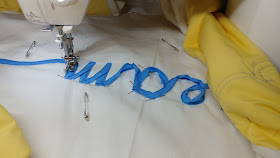
Once happy with the word, I stitched along both edges of the bias tape. This was a very slow process, as going around all the curves and trying to make sure it was aligned correctly took care and time. I stitched through all layers of the quilt sandwich, so this bias tape applique was quilting the quilt at the same time I was stitching it on! Win-win!
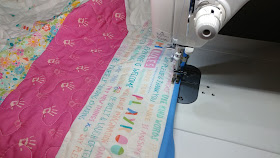
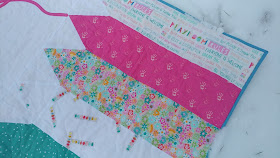
A peek at the back reveals more of the process and shows my starts and stops.
When connecting to the crayon tips, I just folded the raw edge of the bias tape under and into a point so that the line barely touched the tip.
After all four words were sewn down, I switched to my free-motion quilting foot and 50wt Aurifil #2021 White to quilt a medium sized meander all over the rest of the quilt. I quilted right over the crayons, but did not quilt over the bias tape words.
I used more of the Parisian Blue AGF Pure Elements solid to make 2 1/4" wide double fold bias binding and machine sewed it on (tutorial here).
I planned to make a pattern for this quilt to sell in my Etsy shop, but I just can't pretend those words were a piece of cake. Instead, I'll give you all the measurements for making the quilt WITHOUT the words, then you can decide if you want to add those on your own!
I think you could even use a Cricut or similar cutting machine to cut the cursive letters out and applique them on!
And I think a quilt of just crayons would be fabulous too! You could do crayons on both the left and right sides! Wouldn't this be a great quilt for a teacher gift too?? Each student could write their name in the background area!
If you're wondering about those crayon pillows, they were in the Lookbook! You can find the tutorial for them HERE!
Be sure to watch for Playroom fabrics at your favorite quilt shop!
Now, if you've stuck through this post, I'll share the directions for the quilt so you can make one too!
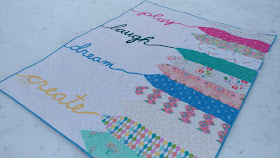
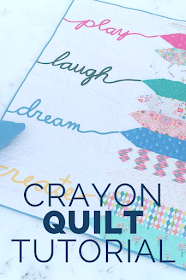
Play, Laugh, Dream, Create Crayon Quilt
What you need:
12 fat eighths (I used prints from the Playroom collection by Mister Domestic)
1/2 yard of four solid fabrics for bias tape words
2 yards background fabric (I used white)
2 yards backing fabric
1/4" bias tape maker
12 crayon tip templates (there are two on each page, so print six pages)
Directions:
1. Decide if you want pointed tips or blunt tips on your crayons and print the correct template. Find the pointed tip template here and the blunt tip template here. Be sure your printer is set to print at 100% (NOT fit to page or scale to fit). Print six copies so you have 12 paper piecing templates.
2. From each fat eighth, cut (1) 5" x 16 1/2" rectangle AND (1) 5" x 5" square. Note: If you're fabric is directional, you may need more yardage to keep the prints going in one direction.
3. From the background fabric, cut (1) 22 1/2" x 54 1/2" rectangle AND (24) 3" x 6" rectangles. (If using the blunt tip crayon template, you'll need (24) 1 1/2" x 1 1/2" squares too.)
4. From the solid fabrics, cut (2) 3/4" wide bias strips from each color. Stitch ends together to make one long strip for each color. Using the bias tape maker, press each strip into a 1/4" bias strip.
5. Use the paper piecing templates to create all 12 crayon tips. Place the 5" print square first, then use the 3" x 6" background fabric rectangles (and 1 1/2" squares if needed) to complete each one. Trim after adding each piece to maintain 1/4" seam allowances. Press well. Trim excess fabric, leaving 1/4" seam allowance to make 4 1/2" x 5" crayon tip blocks. Remove paper.
6. Sew one crayon tip to the end of the matching print 5" x 16 1/2" rectangle. Repeat for all prints.
7. Sew all crayons together.
8. Sew background 22 1/2" x 54 1/2" rectangle to crayon unit.
The top is done!!
9. If you choose to add the bias tape words, then draw a horizontal line along the bottom edge of a crayon, and use that as the guide to create your word. My words are about 5" tall (the letter "d" is 5" tall). Press as you curve the bias tape and pin or glue a lot to hold it in place. Stitch the bias tape down with matching thread.
10. Layer the backing, batting, and quilt top and baste as desired. (This can be done before adding the bias tape!)
11. Quilt as desired. I quilted mine using a medium sized meander.
12. Cut 2 1/4" or 2 1/2" binding strips from the remaining solid fabrics. Bind the quilt using your favorite method! (I machine bind mine following this tutorial.)
Enjoy!!
Please let me know if you make a quilt inspired by this mini tutorial! I'd love to see what you create!!
Find the tutorial for the crayon pillows HERE!
__________
If you liked this post, you may also like these:





Thank you Laura! Oh my gosh this crayon quilt is Awesome! Agreed perfect teacher gift too.
ReplyDeleteNow I’m one of those faint at heart ref stitching down the bias tape:) Your enthusiasm is noted!!
Fantastic Quilt! This Quilt would be so cute to hang up in your child’s playroom. Sew Cute ❣️🌸💕✂️🧵🌸💕
ReplyDeleteThat is the cutest quilt!! I love it but can't imagine all the patience it took for the bias tape. Beautiful!
ReplyDeleteGorgeous gorgeous gorgeous - what a talent !!
ReplyDeleteWow Laura! This quilt is so cute---perfect for any child's room. Sewing all that bias tape-Oh My Goodness_ you have way more patience than I do. You did a fantastic job!
ReplyDeleteGreat tutorial for lettering with bias tape - thanks for all of your tips.
ReplyDeleteBeautiful! My daughter would love something like this. Thanks!
ReplyDeleteYou are so talented! It is being my scope of understanding how you manage to get so much done with your growing family. Too cute!
ReplyDeleteAnother terrific quilt with Mr. Domestic fabric...congratulations.
ReplyDeleteAs sweet as can be! Excellent tutorial, but not very confident that I could handle the bias tape letters.
ReplyDeleteThis is super cute! Thanks for providing the directions and templates. This may become the quilt we make for my son's teacher :)
ReplyDeleteThis is adorable! Well done.
ReplyDelete