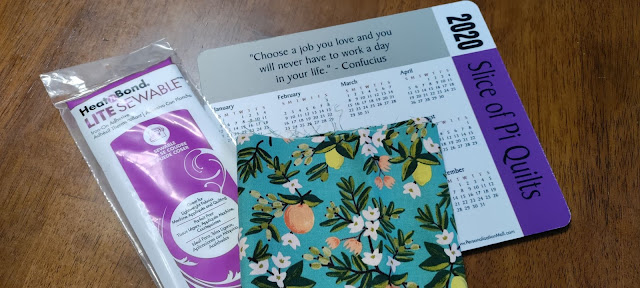
This project has been on my want-to-make list for quite awhile! I had an old mouse pad that was still in great shape, but it had an outdated calendar on it. I wondered if I would be able to recover it with fabric, so an experiment was born!
This post contains affiliate links. If you make a purchase after clicking the links, I may receive a small commission at no extra cost to you. As an Amazon Associate I earn from qualifying purchases.
If you're new here, hello! I'm Laura! I design quilt patterns, and I'm a self-proclaimed deal hunter! Be sure to join the popular Quilting & Sewing Deals Facebook group where I post sales, deals, and coupon codes from all around the web!
What you'll need:
- A mouse pad - I'm using one I already had, but if you need one, you might try this one
- Fusible web like Heat-N-Bond
- Fabric that is slightly bigger than your mouse pad
- A pen or pencil
- An iron
Yes, seriously! That's it!
I chose Heat-N-Bond Lite as a fusible because I had it on hand, though regular Heat-N-Bond would be great too. And I picked out a fabric from my stash that I loved that was just bigger than the mouse pad. I'm using a Rifle Paper Co. print from the Primavera collection called Citrus Floral in Teal.
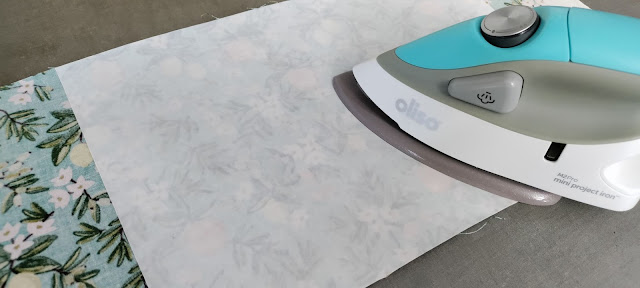
First, I cut a piece of the fusible web that was larger than my mouse pad and pressed it to the wrong side of the fabric. (I used my Oliso mini!)
Then I traced the mousepad onto the paper side of the fusible web. (I used my favorite air erasable pen, but any pen or pencil would work for this.)
When I traced mine, my line was just outside of the actual edge of the mouse pad, so I cut just inside the line. (These are my go-to scissors in my sewing room.) However, you could just rough cut this for now and trim it after pressing it to the mouse pad if you wanted.
Next, I peeled the paper off the fusible web.
I placed the fabric on top of the mouse pad, and once positioned well, I pressed into place. Once cooled, you could cut away any extra fabric around the edges if needed.
That's it!! I thought that pressing the mouse pad might melt it, but it didn't! It worked perfectly!
The fabric fused so well to the mouse pad! It's as if it came from the store just like this! My own Rifle Paper Co. mouse pad!
One thing to note, I would definitely make sure that you can't see the original design of the mouse pad through the fabric that you choose. Depending on the design of the original mouse pad, you might need to choose a darker fabric. This one worked great for me!
I am so thrilled with how this turned out! It took less than 10 minutes to make too! I think custom mouse pads would make wonderful gifts for friends or Father's Day! Imagine all the fabric possibilities!
Do you have a mouse pad that needs a makeover?? Grab some fabric and give it a new life!
If you like this tutorial, I'd love for you to sign up for my newsletter! That's where I share my patterns, tutorials, and what I'm working on!
__________
If you liked this post, you may also like these:


Great idea! I will try this makeover soon. Thanks, Laura
ReplyDeleteThanks for such a fun and easy project. I’ll be making over mine today.
ReplyDeleteSo cute, and clever, Laura!!!
ReplyDeletelove this quick and fun project! Thanks! I don't have Heat N Bond, but I have MistyFuse. I will try that instead!
ReplyDeleteWhat a fun project - and useful, too!
ReplyDeleteYay! I just thought about a week ago that I need to get a new mouse pad! Now I will have one exactly the way I want it!
ReplyDeleteGreat idea. Thanks for the detailed instructions, didn't even have to look for my thinking cap. lol. Anne
ReplyDeleteWho knew! My current mouse pad is so ugly, this is definitely one of my projects for today! Thank you!
ReplyDeleteThank you! Great idea. I can’t wait to try this.
ReplyDeleteWhat a great idea! I thought the mouse pad would melt too. Glad it didn't.
ReplyDeleteKudos and I agree with everyone!! Woot! Project for me today. I also have an old mousepad hanging around that I will change. Thank you. What a neat idea!
ReplyDeleteI like this Laura, a great idea. Thanks
ReplyDeleteWhat a great idea for the tiny piece of really expensive, beloved fabric that you absolutely cannot toss! Thanks!
ReplyDeleteOh my goodness, what a brilliant idea! My mom has mousepads at her shop that were made using a heat press, and the images are fading with so much use. I will have to share this option for tidying them up!
ReplyDeleteBrandy
Wow, what a great idea. Thanks for the directions.
ReplyDeleteSo simple, so great! Thank you - I'm going to recover my mousepad today!!!
ReplyDeleteLove the mouse pad idea. will make over mine with some neat CAT fabric-the mouse may be scared lol.
ReplyDeleteWhat a great idea! Can't wait to try it! Thanks bunches!
ReplyDeleteRadhey Krishna Cotweaving is Cotton & Polyster Greige Fabric Manufacturic Company certified with GOTS, GRS, BCIfabric manufacturer in kishangarh
ReplyDeleteThis is a great idea!
ReplyDelete