(Catch up by reading about Round 1 and Round 2 first.)
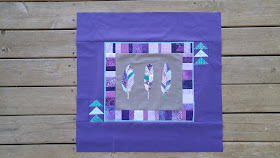
This round, Heather and I each had our own quilts back. There aren't many rules when we are working on our own (not that I followed the rules last round anyways...).
This post contains affiliate links. As an Amazon Associate I earn from qualifying purchases.
If you're new here, hello! I'm Laura! I design quilt patterns, and I'm a self-proclaimed deal hunter! Be sure to join the popular Quilting & Sewing Deals Facebook group where I post sales, deals, and coupon codes from all around the web!
Before we even exchanged starting blocks, I had it in my head that for one round I would turn Heather's block on point to add interest to the quilt. However, her block is directional! I was bummed I couldn't change the direction of her block, but decided on the next best thing - I would try it on my own block!
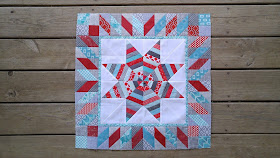
I started out by adding a 1/2" aqua border. Heather had added a similar border before adding a busier border, so I thought it would tie in well and provide just enough separation before my own busy addition.
I started with the scrappy section. I created a paper pieced template on the computer so the pieces would sew together quickly without any exact measuring. The spacing is the same as the center string star block - each piece is 3/4" wide. The entire strip is 3 1/2" wide. I made eight strips.
After sewing the strips, I laid out a mock up of what I had envisioned. I originally was going to put the red fabric next to the scrappy strip, but after laying it out, decided the red stripe didn't stand out like I wanted it to. So I decided to add a 1/4" white strip on either side of the scrappy strip.
To assemble the corner triangle units, I started with a white right triangle. Then I added a 1/2" red strip and the 1/4" white strip.
Next was the string pieced border. I wanted this border to have mitered corners, so that added a challenge! I had to use a y-seam in order to sew them to the triangle unit.
I sewed the four corner triangle units onto the main quilt. This was trickier than it sounds! I laid out one corner at a time, lined up the main block so there was about 3/8" extra of the corner block on either side, and pinned in place. I lined it up mainly by eye using a couple points on the paper piecing strips for reference. Once sewn, I was ecstatic to see that it had worked! I sewed the opposite corner on then trimmed the excess fabric from the seam allowances. Then repeated with the remaining corners. I was literally jumping with joy when I saw that they had lined up nearly perfectly!
I removed the paper from the strips, snapped some pictures, and sent it off to Heather!
The quilt now measures 36" square. I already have ideas swirling for what to do when it comes back to me again!
I love it!
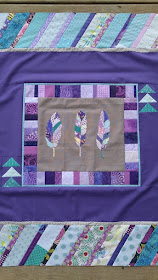
Now for what Heather added to her quilt!
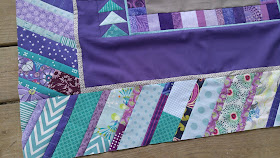
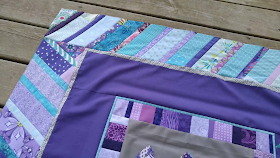
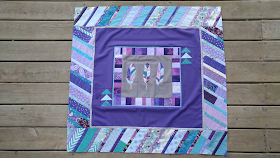
She added two borders this round. First, a 1/2" gray strip. Then a 6" border of angled strips in purples and aqua.
This is the last time we will sew onto each other's quilts. Once we get our own quilts back next month, we can finish them however we want. Come back next month to get an update!
__________
If you liked this post, you may also like these:




I absolutely love what you did to your block. It is amazing!
ReplyDeleteAmazing!!!
ReplyDeleteI loved reading about your round robin quilts! I have been teaching a round robin at our guild for the last 4 years. We started with a 12.5" leftover block and switched them around each month and ended up with charity quilts. I designed each and every row and the quilts have turned out beautiful. This last year, was more detailed and I cheated and used a free pattern that I found on the internet with some modification. Not sure what I'll do for next year but you have inspired me. Maybe you and Heather should host a round robin blog for 6 months. I would participate. Carol
ReplyDeleteI loved reading about your round robin quilts! I have been teaching a round robin at our guild for the last 4 years. We started with a 12.5" leftover block and switched them around each month and ended up with charity quilts. I designed each and every row and the quilts have turned out beautiful. This last year, was more detailed and I cheated and used a free pattern that I found on the internet with some modification. Not sure what I'll do for next year but you have inspired me. Maybe you and Heather should host a round robin blog for 6 months. I would participate. Carol
ReplyDelete