A couple weeks ago, Karlee Porter shared on Instagram how she was making a puff quilt on her longarm. I instantly thought, "Why didn't I think of that?!" So I HAD to make one! (Check out the one Karlee made HERE!)
This post contains affiliate links. If you make a purchase after clicking the links, I may receive a small commission at no extra cost to you. As an Amazon Associate I earn from qualifying purchases.
If you're new here, hello! I'm Laura! I design quilt patterns, and I'm a self-proclaimed deal hunter! Be sure to join the popular Quilting & Sewing Deals Facebook group where I post sales, deals, and coupon codes from all around the web!
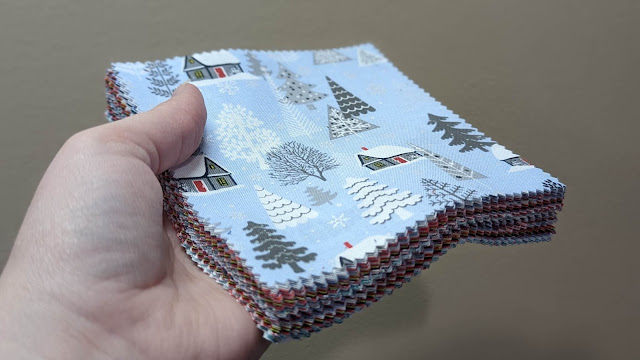
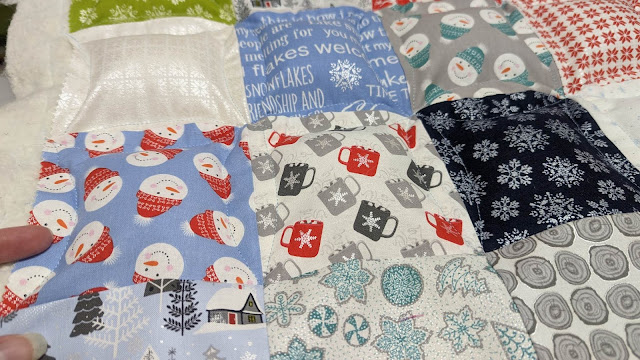
I had gotten a pack of charm squares from Cherry Guidry at Quilt Market of one of her upcoming collections called Nordic Cabin, and it was perfect for a snow day sew day experiment!
I laid out all the 5" squares on my design wall (a flannel backed tablecloth pinned on my wall) so I could overthink their random placement. I had just 40 squares, so I added two more from my stash to make an even 6 x 7 layout. This isn't going to be a very big quilt, but it's an experiment, so I'm okay with small quilts for that!
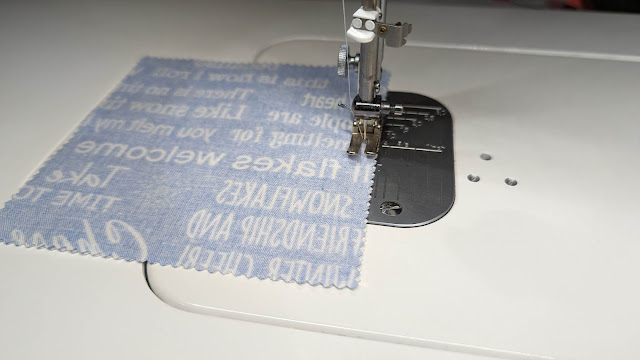
Then I just used my 1/4" foot to piece them into rows.
And then the rows into a quilt top. When sewing rows together, I press all the seams in odd numbered rows to the left, and the seams in even numbered rows to the right. This allows the seams to "nest" and make for nearly perfect corners!
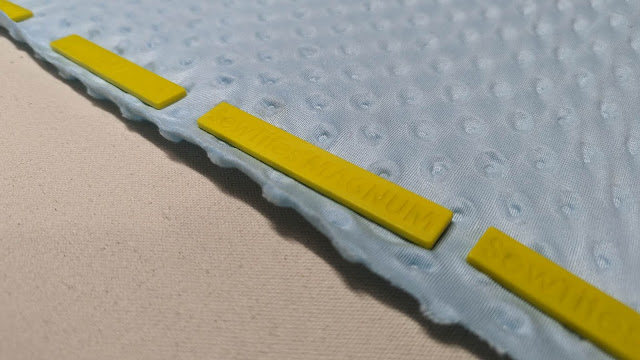
I've been using SewTites magnets to hold my backing fabric onto my longarm leaders for awhile now. I love that they hold minky fabric well! And they're SO quick and easy to put on and take off.
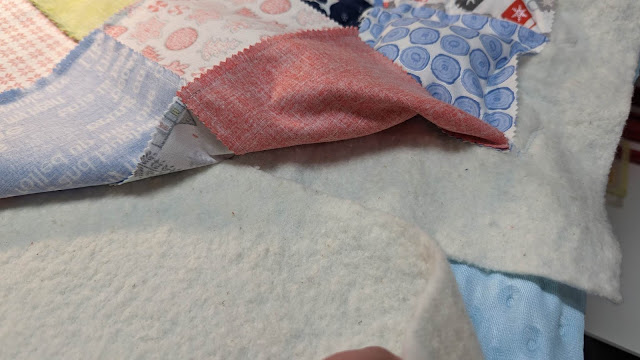
I used a light blue dot minky that I had in my stash, then some 80/20 batting from Batting Super Sale. I was using up batting scraps, so you can see in the photo below how the batting doesn't reach all the way to the bottom of the quilt. More on that later.
Once the quilt was loaded on the longarm, it was time to find the Poly-Fil. I *swore* I had a huge bag of Poly-Fil in my stash, but after an hour of hunting, I just couldn't find it. I was making this quilt on a snow day with temps well into the negatives, so I was not going to run to the store. As a last-ditch effort to keep this project from becoming a UFO, I messaged my neighbor to see if she had any. And behold! A brand new bag! Some people ask their neighbors for eggs; I ask mine for craft supplies!
Now it was time for the good part! A few years ago, I learned a "one start, one stop" technique of quilting from Dorie Hruska from her book Making Connections. I've used it several times when quilting, but it never occurred to me to use it for making a puff quilt! If you can see in the photo below, it shows the first line of stitching. You quilt up the left side of the first square, across the top, then down the right side. Then you repeat this "up, right, down" pattern all the way across the first row.
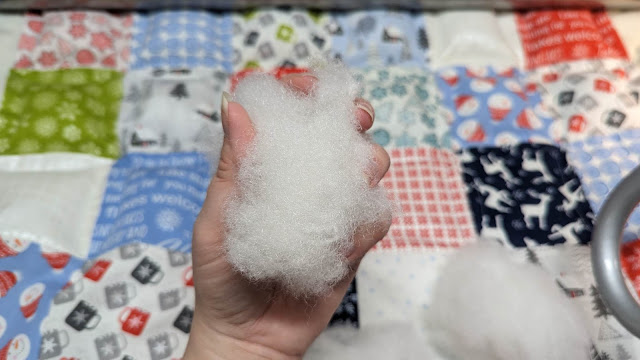
Then you make snowballs of Poly-Fil stuffing...
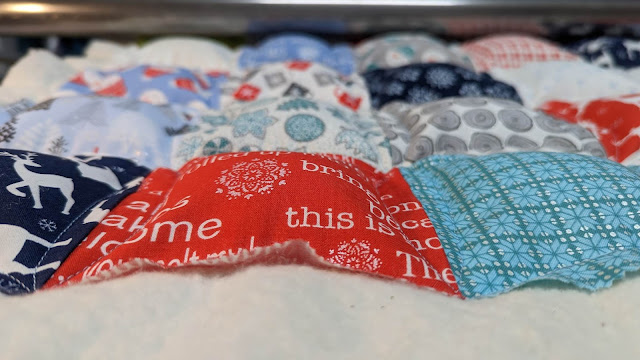
...and lift up the quilt top to stuff them under each square to create the puffs!
Then starting on the right side of the quilt, you quilt all the way across the bottom of each block of the first row. Then you repeat the "up, right, down" pattern for the second row, stuff them, then quilt across the bottoms of the squares. Rinse and repeat.
When I got to the end of my batting scrap, I laid another piece just overlapping the first one and just kept going.
The process was very quick and easy! And it created the BEST texture!
I used minky for the back, and Karlee used fleece on the back of hers. I like how those fabrics have a bit of stretch to accommodate for the puffiness while the quilt is on the longarm frame. Also, if you have side clamps for your longarm, I'd use those to help keep the whole thing square as you quilt.
After taking it off the longarm, I cut off the excess batting and backing. This required a bit of pressure on my ruler to flatten the puffs so I could cut a straight-ish line.
I found a gray fat quarter in my stash that had white dots like snow, so that became my binding. I still cut my usual 2 1/4" strips, and it worked great! I made sure to squish the puffs if needed so I could get the binding lined up well along the edge.
I remembered to sew one of my satin quilt labels into the binding too! This is my 37th quilt finish for the year, and my 445th quilt finish of all time!
I braved the below zero temps outside to get a few pictures of the quilt in the snow.
Look at the back! Can't you just feel how soft and comfy it is?!
I absolutely love trying new things, and this worked out fantastic! I would do it again, but I'd make more squares so the quilt would be even bigger. The technique does make the quilt turn out smaller than a traditional quilt would, so this one is only about 24" x 28". It's great for a lap quilt for my kids, but it would need to be bigger for any useful lap quilt for an adult. I'd even suggest using 6" squares instead of the 5" ones if you planned to cut your own squares. I think that would work great too!
Overall, I'm very pleased with how it turned out, and I'd definitely make another one!
P.S. If you were to inspect this quilt up close, you'd find that my stitches aren't perfect and my quilting lines aren't exactly straight. I learned a lot, and I know for a fact there will be no quilt police coming to arrest me for a few imperfections. And we will love and use this quilt just as we would a perfect one! With anything you try for the first time, give yourself grace. Life lessons there, not just for quilts! :)
__________
If you liked this post, you may also like these:










Thanks for the in depth tutorial! I've always wanted to make a puff quilt but the process didn't seem like any fun. This seems very fun! Merry Christmas!
ReplyDeleteThank you for the tutorial. I have always wanted to try this..
ReplyDeleteI want to make one, but want to use wool for stuffing. I have 33 sheep, so I want to use what I have.
ReplyDeleteI love your fabric!
That is one interesting technique. I will link it up to my Tips and Tutorials for the month if you don't mind. You are a brave woman to go out into the cold like that for a photo shoot. I stayed in as much as possible during our deep freeze!
ReplyDeleteThank you for the tutorial. The quilt is absolutely adorable.
ReplyDeleteI went over and looked at Karlee's too. You two have really nailed this one! That is a much better construction method than the traditional one. I just might try that! Squirrel, squirrel, squirre! LOL
ReplyDeleteUsing a long arm helped keep the sandwich somewhat taut and lined up, how would you modify the technique to use on a domestic machine?
ReplyDelete