Well, look no further! Here's what to do!
This post contains affiliate links. As an Amazon Associate I earn from qualifying purchases.
If you're new here, hello! I'm Laura! I design quilt patterns, and I'm a self-proclaimed deal hunter! Be sure to join the popular Quilting & Sewing Deals Facebook group where I post sales, deals, and coupon codes from all around the web!
In my quest to take fun quilty photos for my pattern covers and for photos to use for my blog (you might need photos for entering a quilt show), I've tried out a lot of methods for getting flat shots of my quilts (just ask my husband!). I've tried many different hangers and rods, and I've tried nearly every type of tape invented. But out of everything I've used, there's just one tape that works better than anything else. I use it for small quilts and large quilts. I use it for indoor photos and outdoor photos. I use it on any type of wall and surface. Basically, if I need any quilt photos, I use this tape!
You just need two things for taking a great flat shot of your quilt:
1. 3M Scotch brand green masking tape for hard-to-stick surfaces. This is NOT the same as that blue or green painter's tape. Those will not work the same (yes, I've tried them).
2. A large blank wall. This can be inside or outside. It can be large enough vertically or horizontally. It can be made of sheetrock, wood, brick, metal, or cinder blocks. It can be painted or stained (or not!). It can be a building, garage door, fence, trash dumpster... Your imagination is the limit!
(Of course the sunshine, cloud cover, and time of day will all affect the way your quilt looks too. Experiment! See what works best for your quilt and camera!)
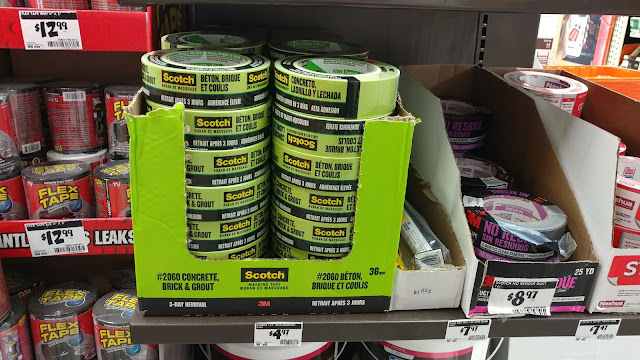
I purchase my 3M Scotch green masking tape at Home Depot, but it's also available on Amazon.
I've looked for it at several different Home Depot locations. It is always with the other tapes near the paint department. (Remember though, it is NOT blue or green painter's tape or Frog tape.)
At this location, it was on a shelf behind the paint mixing area.
The tape is about $5 per roll.
There a few different widths available on Amazon. I have only found the 1.41" wide version at Home Depot.
Next, find a wall. I am constantly on the lookout for fun and interesting walls to use for quilt photo shoots! You might be surprised by what you find once you start looking! I like to look for walls and backgrounds that accent the colors in my quilt.
The garage doors of storage facilities are often fun colors, alleyways behind businesses sometimes have great brick walls, schools usually have large exterior walls, and even playgrounds, park gazebos, and bridges can work! Please be sure to ask permission before visiting and taking photographs on any private property.
Also note that the tape is meant to be temporary. Do not leave the tape on any surface (your quilt or a wall) for more than a day. The tape can create a permanent bond that might not be easily removed. The packaging on the tape says to remove within three days, but I've never let it sit for that long. I put the tape on just before going to take pictures, and remove it when I'm done. I've never tested it for longer than a few hours. When removing the tape after a few hours, it is very easy to remove and doesn't leave any residue at all. Very similar to the usual painter's tape.
Once you find the wall you want to use, you need to prep your quilt for photographing. I can usually do this at home before visiting the location.
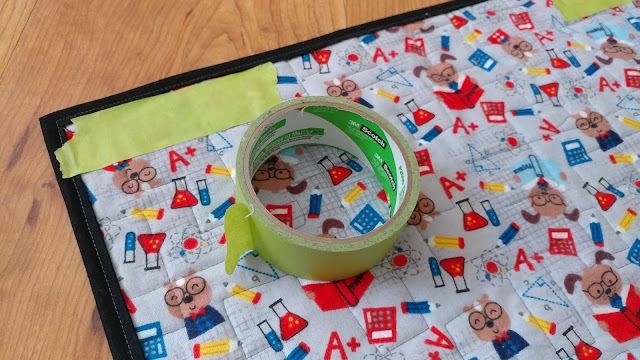
First, apply strips of tape to the back of the quilt. I like to use pieces that are about 6" long, and I space the strips every 12" or so across the top.
(This quilt is 40" wide, so I just used a strip in each corner and one in the middle.)
If it is windy, then also apply strips on the bottom two corners and down the sides.
Next, make a loop of tape for each strip that you put on the quilt. In the example here, I put a total of seven strips of tape on the back of the quilt, so I made seven tape loops too.
I make the loops from about 6"-8" of tape.
Place one loop of tape on each strip.
Now you're ready to hang the quilt!
Once on location, tape the quilt to the wall. Press the tape firmly to the wall. (If you have a particularly stubborn wall, you can put strips of the tape on the wall first just like you did to the back of the quilt. I have not had to do that yet.)
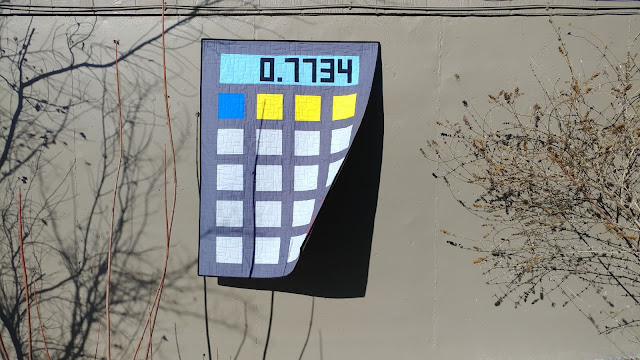
The following photos of my calculator quilt were taken on the side of our house on a very windy day. The wall is painted cement.
The photo below is WITHOUT the tape along the bottom corners and sides.
The photo below is WITH the tape on the bottom corners and sides.
Note that even with the wind blowing the quilt in the first two photos above, the tape is holding the quilt to the painted cement wall perfectly fine.
The calculator quilt pictured above has flannel on the back. I have also used dot minky, regular quilting cotton, and batiks, and all have worked with the tape perfectly as well.
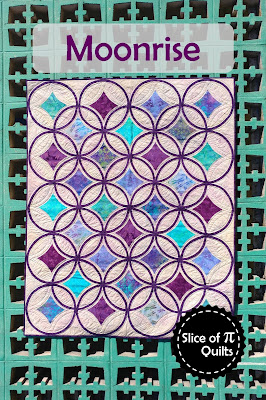
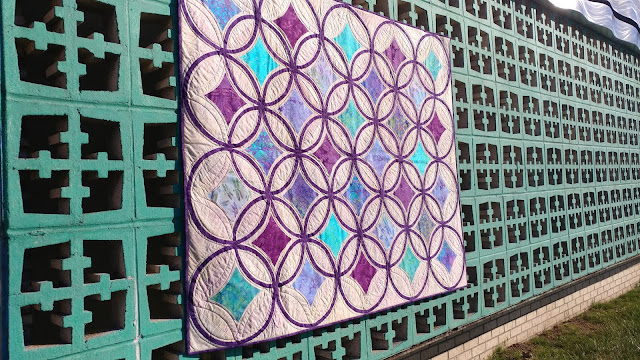
For another example, I used this same 3M Scotch green masking tape for the photos of my Moonrise quilt on this fun turquoise painted cinder block wall.
To give you perspective, the decorative part of the wall is about two feet off the ground, and this quilt is 48" x 60". So the top of the quilt in the photo below is as high as I could reach. It was also a very windy day when I took these photos.
In order to get the pattern cover shot, I added tape along all sides of the quilt, then turned the quilt to hang sideways on the wall.
The tape held the quilt perfectly while I took photos.
Be sure to pin this tutorial on Pinterest so you can remember what tape to use for your next quilt photo shoot!
This post contains affiliate links. Clicking a link will NOT affect the purchase price.
__________
If you liked this post, you may also like these:











Thanks for the tutorial! I'm really excited to try this. I already have a few places in mind.
ReplyDeleteThank you for sharing your secret! I really enjoyed the photos of your great quilts taken in awesome places!
ReplyDeleteOMG! Brilliant! Thanks so much, Laura!
ReplyDeleteSo cool!!!!
ReplyDeleteThis is great info! Thank you!!
ReplyDeleteWOW, that will up my photo game a lot. Thank you for sharing the results of your trial and error.
ReplyDeleteThanks for the tip,I'm to excited to try this 😊
ReplyDeleteI absolutely love this! This is going to be a game changer for my photo taking. :D
ReplyDeleteI am definiely going to try this!
ReplyDeleteThanks for the tip. Definitely going to buy some of this tape.
ReplyDeleteThank you sew much for sharing this tip!
ReplyDeleteuhhh great tip! I was looking for a backdrop for my home for pictures and wondered how to stick a quilt on there, this tape trick is the solution! well first I need good lighting (on order from amazon) now I can start drooling over backdrops. Of course outside natural light is fun and the best but not always possible.
ReplyDeleteGreat information...thanks very much for sharing this tip!!!
ReplyDeleteGreat idea! I use this magical green tape for taping quilt sandwiches to the floor for pinning. It really grips the fabric better than any other tape I've tried!
ReplyDeleteGah, what a great idea! Thank you so much for sharing with us!
ReplyDeleteBrandy
Wow, this is enormously helpful. I can't wait to start looking around town for fun walls! One question--since you prep the tape on your quilt before you go to the location, do you have problems with the quilt then sticking to other things during transport? Or am I just clumsier than most?
ReplyDeleteNice tutorial. Thanks for posting and I hope it’s okay to share this to my FB page so I can find it again when I need it!
ReplyDeleteFantastic instructions, thank you. This is similar to what I learned from Quilting JetGirl, but I never got on well with the tapes I tried. I will certainly try to track down some of that green tape.
ReplyDeleteThanks for this technique! Maybe I won’t need DH to put up a clothesline after all! Win-win!!
ReplyDeleteSuper! This will beat my clothline method.
ReplyDeleteI love hearing about other homeschool quilting mums. As a graduate homeschool mum myself, I got into quilting through my son when he was six. I quickly fell for it and left painting and messy art making behind. Both my sons quilted, the eldest has a published quilt in Man Made Quilts from Shelburne Museum and was a regular ribbon winner in adult category. Sadly in a way neither quilt now though do mend their own clothes- even teach roommates. One is a software programer and rides his bike everywhere. The other is son, soon to graduate mechanical engineering. Of course I’m bias but I like to think quilting complicated patterns- a la George Sisilliano went a long way to shape the path of my sons.
I tried this today, and it worked great! Thank you!
ReplyDeleteAfter reading about a dozen articles on how to photograph quilts, I finally found the information I needed here! Added a quest for the green tape to my “to do” list for today. Thank you for sharing!!!
ReplyDelete