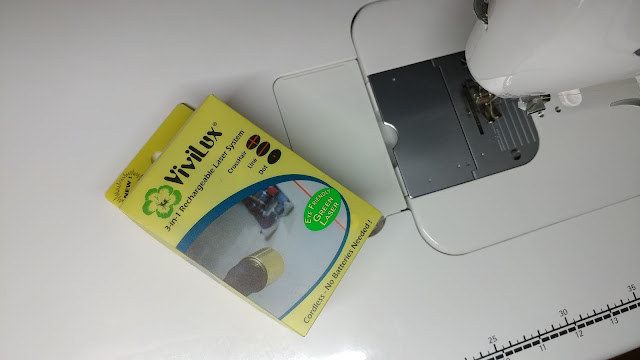
Meet the ViviLux Laser light!
Many new sewing machines come equipped with a built-in laser. The laser line can be used to sew straight lines to make half-square triangles (HSTs) or stitch-and-flip corners without drawing the lines corner to corner. It can also be used for dot-to-dot straight line quilting. BUT buying a new sewing machine equipped with one of these fancy lasers is expensive!
But now, you can add a fancy schmancy laser to ANY sewing machine!!
This post contains affiliate links. As an Amazon Associate I earn from qualifying purchases.
If you're new here, hello! I'm Laura! I design quilt patterns, and I'm a self-proclaimed deal hunter! Be sure to join the popular Quilting & Sewing Deals Facebook group where I post sales, deals, and coupon codes from all around the web!
My first laser was one I bought at Harbor Freight that's intended to be used on a circular saw. It did the job, but it took some creative maneuvers to get it to line up properly.
The ViviLux lasers are made especially for sewists!! Every single drawback of the original laser has been addressed! (You can buy the ViviLux lasers on Amazon (red or green) and directly on their website (red HERE and green HERE). They are even available at many quilt shops!)
- It comes with Velcro to attach to your machine. You CAN get a magnetic version, but if your machine is like mine, it's not magnetic! The Velcro holds the laser perfectly in place. (If you're concerned about sticking the Velcro directly onto your machine, you could always put a Command strip on first, then just stick the Velcro to that!)
- It's rechargeable! No batteries to replace ever!!
- It has a long adjustable "neck" so you can position the laser anywhere you like.
- You can get the laser in red, but there's also a GREEN laser!! The green laser is proven to be gentler on the eyes and is better for people who are light sensitive or have other health concerns with red lasers. (The green one also has a stronger "neck" so it stays positioned better.)
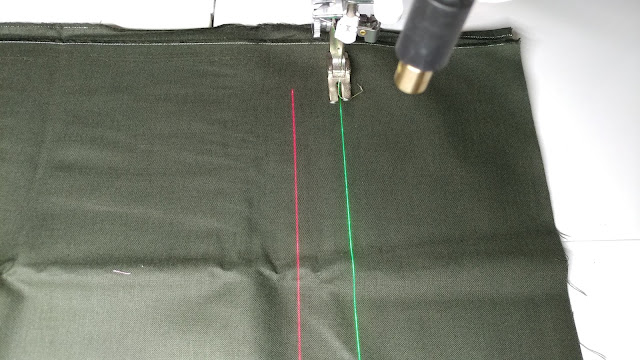
- The laser comes with three different tips to change the laser shape: a line, a cross-hair lens, and a dot. The dot can be used to shine exactly where your needle enters the fabric. The cross-hair lens can be used on an embroidery machine for lining up embroidery designs. Of course my favorite is the line!
- The laser line is thin and bright. The line is definitely thinner than my Harbor Freight laser, meaning more accurate sewing. And the light is bright enough that you can see it on any fabric - even on red or green fabric! I sew with a Daylight Slimline Floor Lamp which is very bright, and you can easily see the laser with this light on! (All the photos for this post were taken with my floor lamp on directly above my sewing machine.)
- Not in the US? No problem! You can purchase lasers with an A/N plug, an EU plug, or a UK plug for recharging. The plugs even have a USB end, so I think they would charge that way too! (If Amazon doesn't show this option, you can order them directly from the ViviLux website in RED or GREEN.)
I've had the red laser for several months now and have been using it lots! I got to meet Dave (the man behind the lasers!) at Quilt Market earlier this year, and I got a green laser (my favorite!). I've been waiting to share these with you though because Dave issued a recall on the last batch of lasers. The laser light was extremely dim, and you could barely see it. But they're restocked and just as they should be now!
Note: As with any laser, do not look into the laser itself directly. If you have small children, make sure they can not get hold of it. It is perfectly safe to view the light that hits the sewing machine surface.
Want to see how it works?
First, attach the laser with the Velcro strip provided. You can mount the laser anywhere on your machine that won't interfere with the thread path. I put mine on the front of my machine to the right of my tension knobs. It would also work to mount on the left side, on the top of the machine, or even inside the throat space!
Position the laser for the task. The bendable neck/arm/wand/thingamajig makes this super easy! Bend it in a way to avoid the thread path and any moving parts on your sewing machine. You can unscrew the tip of the laser just a bit to fine tune the angle of the laser if needed too.
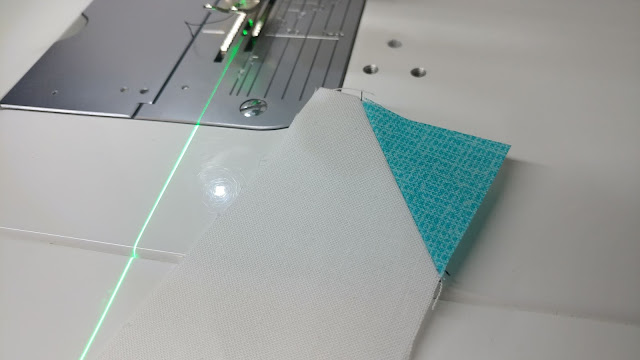
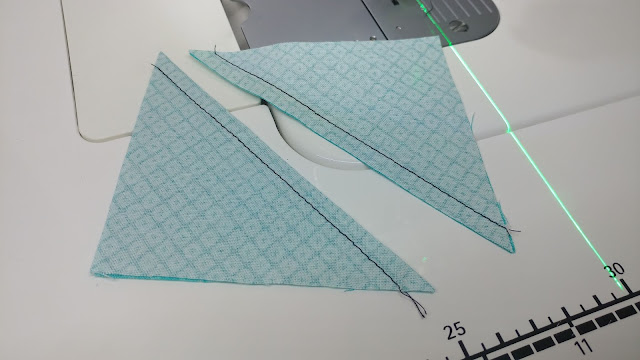
To sew half-square triangles (two at a time), line the laser up with the edge of your 1/4" presser foot. Keep the corner of the square in line with the laser line the entire time the machine feeds the fabric. Then flip the square around, line the corners up with the laser line, and feed it through again.
It saves SO much time not having to draw the lines on the squares!! And it's much more accurate than eyeballing a straight line!
I'm always on the hunt for ways to save time when sewing! This is by far my most favorite time-saving notion I own!
Let me know if you try one!
Red laser (on Amazon and on the ViviLux website with free US shipping!)
Green laser (on Amazon and with Velcro on the ViviLux website with free US shipping!)
Sharing is caring! Save this post on Pinterest and share it on Facebook!
Linking up with Can I Get a Whoop Whoop and Peacock Party.
__________
If you liked this post, you may also like these:


Wow...that's amazing. Thanks for the review.
ReplyDeleteDo you know if this laser would help with following a pattern for free motion quilting.
ReplyDeleteWow -- which brands of sewing machines have built-in lasers these days?! I thought that was only a longarm machine thing, for following pantograph designs! You learn something every day!
ReplyDeleteThat's very clever! Thank you for sharing, and thank you for linking up to the Peacock Party.
ReplyDeleteI just bought one of these at a quilt show a couple of weeks ago! 🙂
ReplyDeleteThis looks very cool and I appreciate your informative post - thank you!
ReplyDeleteAwesome demo, Laura! I'm in!
ReplyDeleteGreat! I used the old version and didn't have much luck with it. This one seems better and Dave seems responsive - so that is promising! I love not marking and won't go back so it will either be a cling vinyl sheet or a laser!
ReplyDeleteThis is now at the top of my wish list!!!!! I used your tutorial to attach the same Harbor Freight to my machine but I kept having problems with the battery running out and it's hard to get replacements. This seems amazing! It's a steep enough price tag that it will have to wait until gift-giving season, I think. Do I understand correctly that you like the green better than the red?
ReplyDeleteI love the idea of this, but for the $79 price tag for the green laser, I guess I will just stick with Harbor Freight.
ReplyDeleteI was definitely reluctant for that reason too! After trying it though, it is worth it! It's so much easier to align and has a much crisper laser line. It's a great item to put on a holiday wish list!
Delete$59.95 at Amazon :)
DeleteYes!! Amazon prices do fluctuate often, so grab it when you see the lower price!
Deletethanks so much for sharing l will look into this further
ReplyDeleteI have the red laser and I have a lot of trouble getting it positioned properly, ie, getting it to stay where I put it. There is always some "drift" in angle or location after I bend it into place. Any suggestions for how you get yours to stay put?
ReplyDeleteThe green laser has a stronger "neck" which is why I recommend it more. To keep my red laser in position, I make sure the laser tip is screwed on tightly, and I position the neck as "relaxed" as possible - meaning I don't stretch it over to where I want it, but instead do small adjustments to angle the laser line until it settles right where I need it. I will also change the way I have it on the Velcro to get the line close before I begin adjusting the neck. On my machine, I also tend to place the neck on top of the tension knob and that really helps it to hold it's position too!
DeleteI can't find it on Amazon. Where else can I buy the green laser?
ReplyDeleteAs of today (10/29), the green laser is out of stock from ViviLux and all sources that I know of. I would keep checking the ViviLux website, as that will be where it will restock first! Dave says it should be within the next week or so! https://harbor-sales.com/viewItem.asp?idProduct=7825&idAffiliate=6
DeleteLove this “ATTACHMENT” and your explanation of how to get it to work for us quilters. I’m always looking for speeding up my projects and increasing accuracy of sewing. Thank you
ReplyDelete