Sharon Burgess of Lilabelle Lane Creations has just released a new book especially for English paper piecing, or EPP called A Stitch in Time. I've only dabbled in EPP, but have never actually completed a project before. When Sharon offered a chance to be part of her book release blog tour, I knew it was the perfect chance for me to try it out!
This post contains affiliate links. As an Amazon Associate I earn from qualifying purchases.
If you're new here, hello! I'm Laura! I design quilt patterns, and I'm a self-proclaimed deal hunter! Be sure to join the popular Quilting & Sewing Deals Facebook group where I post sales, deals, and coupon codes from all around the web!
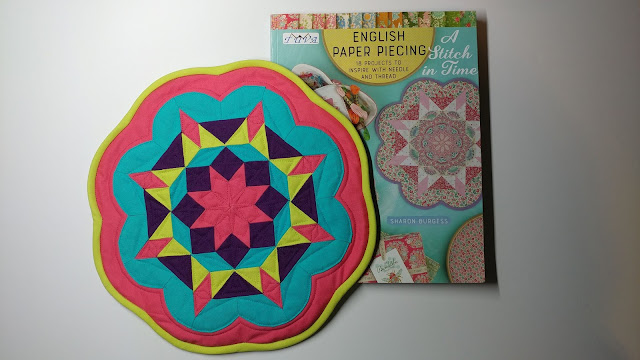
I chose the Dahlia candle mat from the book for my project. It's pictured right there on the cover!
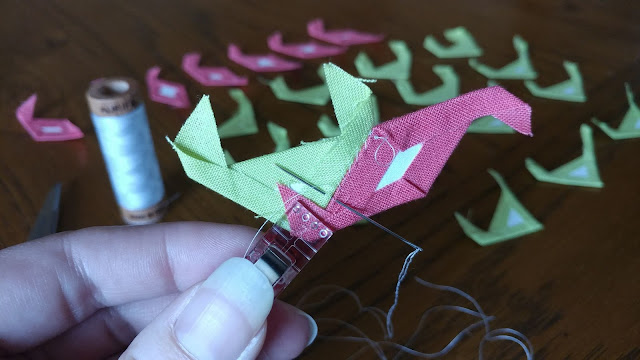
In the book, the projects are all made with dainty florals, but I wanted to make something that was more my style. I chose four Kona solids in a palette I just can't get enough of: Punch, Hibiscus, Breakers, and Cactus. I also chose an 80wt Aurifil thread in #2600 Dove Grey.
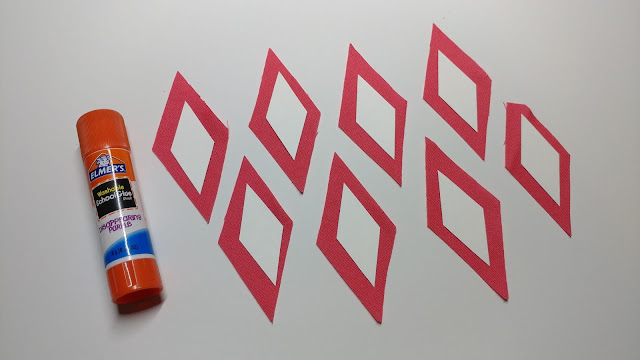
First up: glue basting.
I'm going to be really honest with you: I do not like glue basting. I want to like it! I mean, it is so much faster than thread basting. And you can do many different shapes that just aren't possible with thread basting (i.e. curves like in this project). I've given it more than a couple chances. But it feels more like arts and crafts than sewing. And sticky.
Did I mention sticky?
But it was necessary for this project, and I'm always willing to do a tiny bit of something that's not my favorite in order to accomplish the bigger picture.
I shouldn't admit this, but before I could start sewing the pieces together, I had to google how to make a sewing knot in the thread. In case you're not sure either, this one is helpful. I didn't double over my thread, but maybe I'll try that next time!
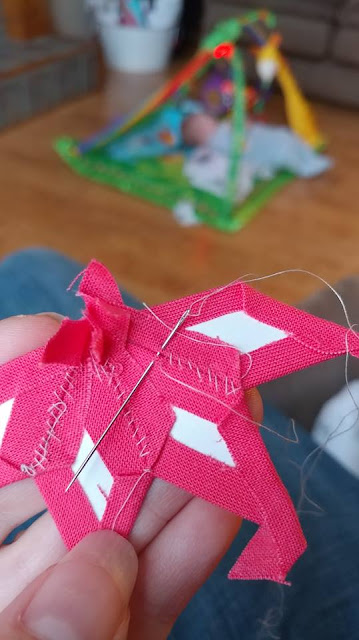
I've watched several videos on EPP before, so I "know" how to do it. But actually doing it is a whole other ballgame! I knew I wanted to aim for the "flat back stitch" when stitching my pieces together. Practice makes progress!
Just keep sewing, just keep sewing...
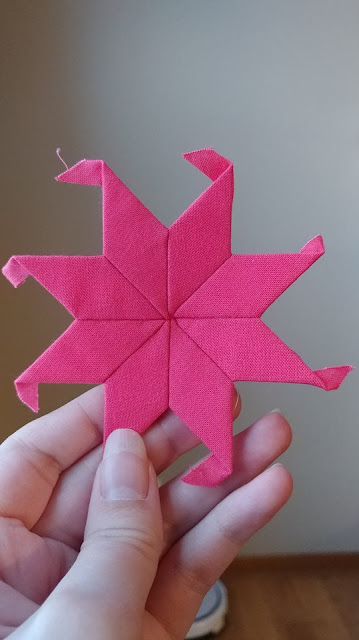
I loved watching the Dahlia come together as more pieces were added! We got several inches of snow over the weekend, so this was the perfect quilty project to work on while staying warm inside!
I especially loved how it looked behind the seams!
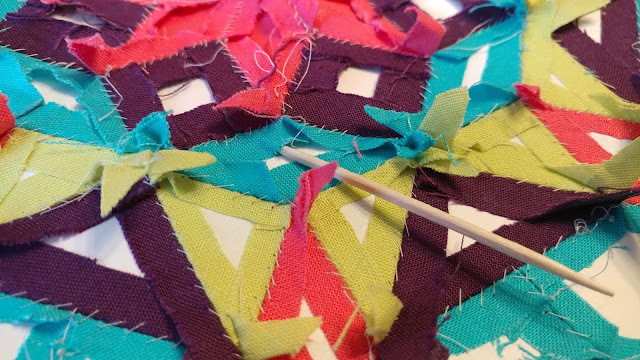
Once finished, it was time to remove the papers. Another reason I'm not fond of glue basting! A toothpick really helped release the glue from the paper, and it really didn't take that long to do.
In the book, the Dahlia is finished differently, but I wanted to make it into a mini quilt.
I layered a fat quarter print for the backing, Warm & Natural batting, and Kona Punch for the top. After centering the Dahlia on the top, I pin basted all the layers together.
I picked out some great Aurifil 50wt threads for quilting: Shining Green #5017, Bright Turquoise #5005, Medium Carmine Red #2455, and Dark Dusty Grape #2581.
My walking foot did all the quilting. I did consider hand quilting - or at least adding a hand quilted detail - but in the end decided to save that for another project.
This is when I realized I forgot to stitch two of the pieces together! Oh well! Design element!
After the quilting, I used my air-erasable pen to draw a line about 1" away from the Dahlia, following the same shape.
Then I cut it out with my fabric scissors (the ones I keep hidden from everybody else!).
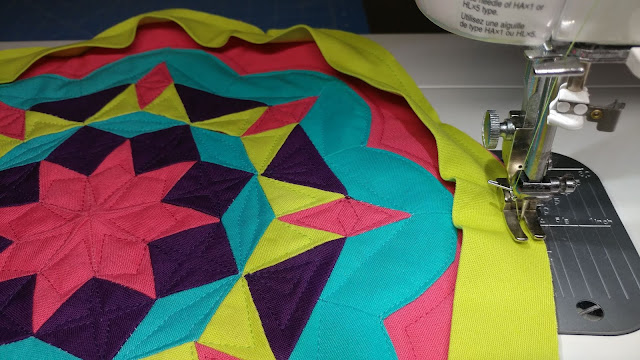
Next, I stitched on bias binding in Kona Cactus
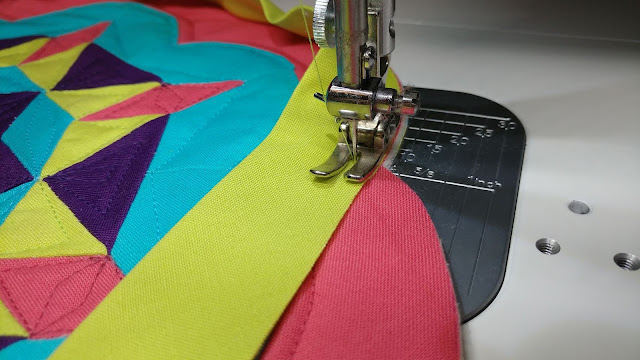
I recently learned a trick from Jenny at Missouri Star about adding binding to curves and odd shapes: just pull the edge of the quilt straight and keep sewing as if the edge of the quilt was straight. It worked pretty darn well! Who knew!?
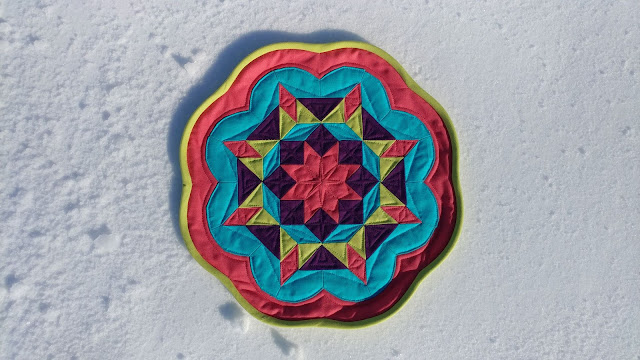
Once sewn to the front, I pressed the binding over to the back and machine stitched it on like usual. The binding curves more gently than the Dahlia, but I love the unique shape it gives the mini quilt.
The finished mini quilt is right at 12" across.
I really enjoyed the slow stitching of this project!
Now I want to add all kinds of EPP projects to my quilty to-do list! I love having a hand stitching project to keep in my purse so I have something to do when I have just a few minutes of waiting.
Sharon's book, "A Stitch in Time," is a great addition to your quilty library! All the projects are small in scale, which means you can try one out (or several) without a huge time commitment or a million pieces to keep track of!
I already have several pages bookmarked for future EPP projects! (I especially love Sharon's idea of using vintage embroidered linens in the projects!)
Look for the book at your local quilt shop! It's also available on Amazon.
I love how different my version of Dahlia looks from the one on the cover! I will never tire of seeing the same thing made in different fabrics!
Be sure to check out the #astitchintimeepp on Instagram as well as Sharon's Instagram page to see more projects from the book!
Do you do any hand sewing or English paper piecing?
Linking up with Main Crush Monday at Cooking Up Quilts, Monday Making at Love Laugh Quilt, What I Made Monday at Pretty Piney, Design Wall Monday at Small Quilts and Doll Quilts, Linky Tuesday at Freemotion by the River, Let's Bee Social at Sew Fresh Quilts, Wednesday Wait Loss at The Inquiring Quilter, Midweek Makers at Quilt Fabrication, Needle & Thread Thursday at My Quit Infatuation, TGIFF at SummerLee Quilts, Finished or Not Friday at Busy Hands Quilts, Can I Get a Whoop Whoop at Confessions of a Fabric Addict, and Friday Foto Fun at Powered by Quilting.
This post contains affiliate links. Clicking a link will NOT affect the purchase price.
__________
If you liked this post, you may also like these:














I agree that glue basting is sticky and feels more like craft than sewing. But I also can't really imagine thread basting. I have only done just a little bit of EPP (I think I'm up to 3 blocks now?), but I can definitely see myself enjoying it more in the future. I love your color palette! Did you use straight grain binding or bias binding?
ReplyDeleteVery, very beautiful, and I love how the shape is not a standard shape!
ReplyDeleteIt's lovely! You did such a fabulous job. I've never heard of the flat back stitch. I always carefully match my thread to the piece I'm attaching so the whip stitch doesn't show. I'm excited to try the flat back stitch!
ReplyDeleteThis is really great work. Thank you for sharing such a good and useful information here in the blog for students.
ReplyDeleteNice job Laura! EPP is not my favorite thing to do, but I did enjoy it while doing it. In otherwords not real high on my list of things I want to do! I do enjoy seeing others projects though:)
ReplyDeleteI've done a little EPP, but never heard of flat back stitch. Although it may be what I do but don't know it!! I'm going to look this book up and see what else is in it. Love your piece in solids. It reminds me of the toy I just bought for my 3yo granddaughter to play with. Those colored wood shapes to place on a preprinted design or make your own design.
ReplyDeleteYour color palette is wonderful and makes this look so modern. So you said you worked on it over the the long weekend.....all that hand stitching!! in one weekend?!! Great job. Saw baby in the background under the mobiles. When choosing between glue and thread basting, I guess you have t weigh the good vs. the bad. Not sure I'll ever try EPP.
ReplyDeleteI used to do EPP (loved it), but now I use the Inklingo method - no paper, no glue. You print the sewing lines on the back of the fabric pieces with an inkjet printer. No affiliation. I am currently sewing the Yin Yang design and it is coming out so perfectly, I'm really excited. Sue (sueclive at aol dot com)
ReplyDeleteThis is lovely! I'm always amazed at the level of difficulty you pick for your *first* project with a technique. I started with hexie flowers! I like EPP as a hand project, I'm working on the Violet Craft EPP lion right now. I always keep a hand sewing project around, but sometimes that is embroidery rather than sewing. I don't love glue basting my EPP papers, but I like it better than thread basting! Your colors in this really make it stand out!
ReplyDeleteI love how your Dahlia turned out. I would also go for bold colours rather than the dainty florals. I have done one block of EPP, in a sampler-type quilt which doesn't even have the top together yet. Shame. :) I can see doing more EPP items, as long as they are different, and not the typical ones seen.
ReplyDeleteSo pretty! I love how it turned out. My sewing bucket list gets longer faster than I can pick items off of it!
ReplyDeleteSuch a lovely finish! I have done a small amount (couple blocks) of EPP, and then gave up. UFO sitting for years. My reasons for not doing it are the same as yours; however, I have not done the glue basting. I will get out my project and try it when I am sitting in my camper on rainy days.
ReplyDeleteIt's so beautiful and your block looks completely different from the one on the book cover! What a difference fabric choice can make :) Sooo, I may have actually laughed out loud about you needing to google how to make a knot in the thread, hehe. I never thought before about how you never need to do that if you're always working by machine. You know I love EPP, but I've only ever done it with whipstitch, never with this flat back stitch. I may have to give that a try to see if it's easier on my wrist than whipstitch. And I've never glue basted. The whole sticky bit is a deterrent for me, too. I'd be willing to do it for some beautiful curved EPP, though, so it may happen sometime. I do have some lovely curved EPP things I'd like to make someday. I look forward to seeing what EPP you incorporate into a project next :)
ReplyDeletethis is pretty freaking amazing! I am so slow at EPP... I should try the back whipstitch... that seems faster!
ReplyDeleteLovely EPP. I tried glue, but found it messy and actually quicker to stitch than glue for me.
ReplyDelete