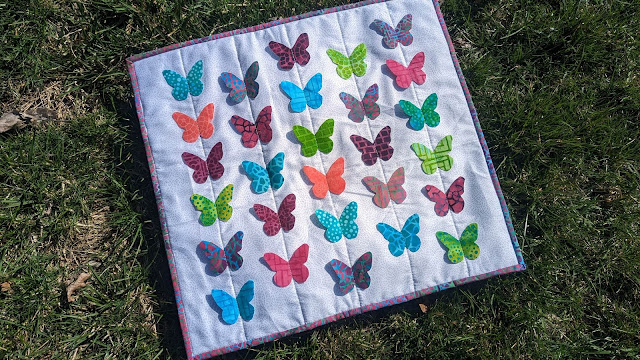
The name of this new batik fabric collection is Bits & Pieces - so I used bits and pieces of it to make a fun mini quilt with 3-D butterflies!
The fabric is a signature collection by Sherry of Powered by Quilting and made by Island Batik, and this week, there are several bloggers showing off what they made with the new fabrics! Be sure to visit the other bloggers posts (listed at the bottom of this post) to see what they made with the same fabric!
This post contains affiliate links. If you make a purchase after clicking the links, I may receive a small commission at no extra cost to you. As an Amazon Associate I earn from qualifying purchases.
If you're new here, hello! I'm Laura! I design quilt patterns, and I'm a self-proclaimed deal hunter! Be sure to join the popular Quilting & Sewing Deals Facebook group where I post sales, deals, and coupon codes from all around the web!
The Bits & Pieces collection is a mix of blues, purples and pinks. Use ALL the heart eye emojis! These colors sing my name!!
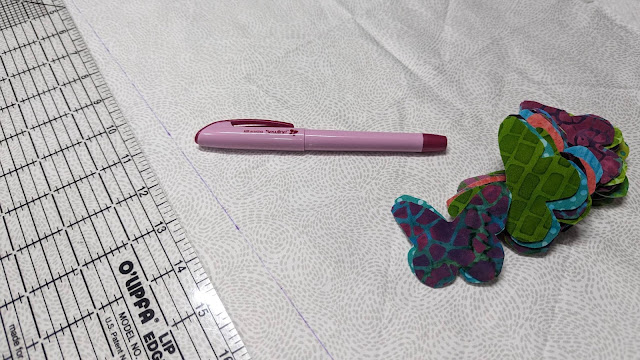
I started by pressing small pieces of the fabric (like 3" squares) onto Pellon Deco Bond interfacing. This has fusible on one side and is quite stiff. Then I used scissors to cut out a butterfly shape from each one. I printed out a clipart butterfly image, then just used that to trace and cut out all the butterflies. I made just a few from each fabric.
Next, I made a quilt sandwich with this white and gray fabric for both the top and bottom. I used a scrap of 80/20 bleached batting inside. I did not pin baste or spray baste, as I felt it was small enough for me to just hold onto the layers.
Next, I used my air erasable pen to draw a vertical line down the middle of the quilt sandwich. Then I drew two lines to the right and two lines to the left of this one. Each line was 3" away from the next.
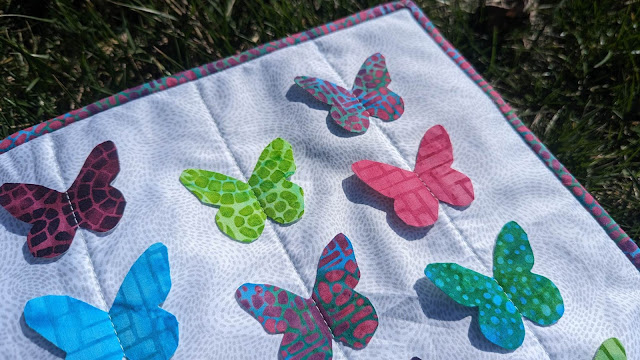
Once the lines were drawn onto the quilt sandwich, I randomly placed some butterflies along the lines. I tried to keep them about 1/2" apart, but I just "eyeballed" it. I didn't actually measure. Once happy with the arrangement, I picked the butterflies back up, careful to keep them in the correct order. Then I took the quilt sandwich to my sewing machine, and used my walking foot to stitch down the center line, placing butterflies back along the line as I sewed.
I did not stitch down the wings. I only stitched down the center of each butterfly. After sewing all the columns of butterflies, I trimmed off the excess batting/backing and machine sewed on some binding! (Tutorial HERE.)
The whole quilt took about an hour to make, which is my favorite kind of quilt! The fast ones!
The finished quilt measures about 18" across and 15" down. The picture below shows my quilt label that I use on every quilt too!
This is such a fun quilt, and I've wanted to cross it off my bucket list for a long time. I've made similar quilts using this technique a few times before. Check out those posts HERE and HERE and HERE. Ever since making those quilts, I've wanted to try the technique with butterfly wings!
Be sure to check out all the other stops on the blog hop! I absolutely LOVE seeing what different projects are created from the same fabric!
March 31 - Laura at Slice of Pi Quilts <--- That's me!
__________
If you liked this post, you may also like these:


Hello Laura. This is adorable and it looks like such a quick, fun, project. I love it! Have a great day!
ReplyDeleteCute quilt! I like the 3-D idea!
ReplyDeleteReally creative idea-love it
ReplyDeleteLove the 3D effect! I know this one is a wall hanging and won't get much washing, but wondering how the mug rugs with hearts wash and hold up?!
ReplyDelete