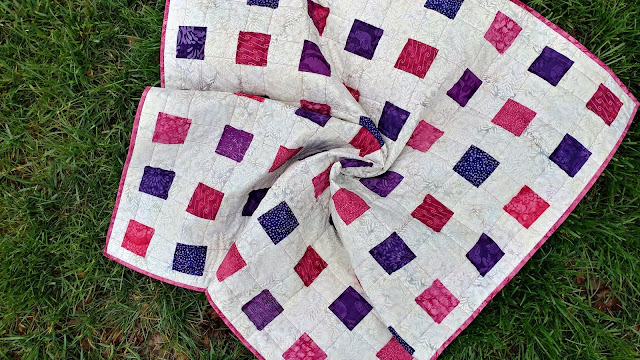
The result is this 40" square baby quilt that took me exactly 3 hours to make!
This post contains affiliate links. As an Amazon Associate I earn from qualifying purchases.
If you're new here, hello! I'm Laura! I design quilt patterns, and I'm a self-proclaimed deal hunter! Be sure to join the popular Quilting & Sewing Deals Facebook group where I post sales, deals, and coupon codes from all around the web!
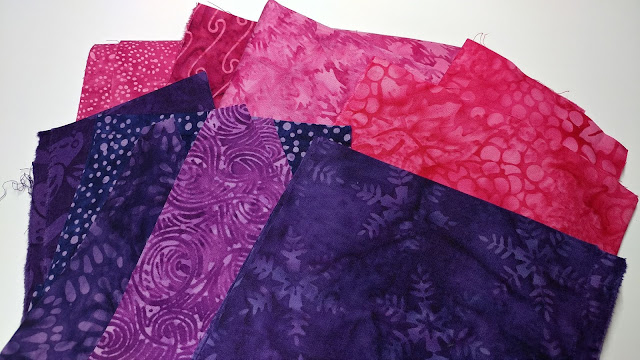
I started with a few Island Batik fabric scraps in pink and purple. All of these are leftover from other projects. A couple were just odd-shaped triangles, and a couple were selvage trimmings. I absolutely love how saturated the colors are in these batiks!
If you remember from this post, as part of the Island Batik Ambassador program this year, I received an Accuquilt Go! Cutting System in addition to all the beautiful Island Batik fabrics!
I have NEVER used an Accuquilt machine before, so I had no idea what to expect.
Well, IT WAS SO EASY!! And FAST!!
Here's how it works:
Choose your die. I used this one that has four 2 1/2" squares. You lay it with the foam side up.
Lay your fabric on top of the die.
Place the cutting mat on top.
Turn the handle (which is super easy to turn!) to feed the die through the rollers.
And voila!
Perfectly cut squares in seconds! It seriously took much longer to take the pictures and write this out than it did cutting!
Since I was using scraps, most of my pieces were just two fabric layers thick. But in one instance, I was able to cut six layers of fabric at one time! That made 24 - 2 1/2" squares at one time!!
After cutting, I taped a 1 1/4 yard piece of fabric for the backing onto my wood floor. Then I put Hobbs cotton batting on top. The crib sized batting was perfectly sized!
I laid a 1 1/4 yard piece of a neutral fabric with a subtle floral print on top of the batting. Using my favorite disappearing ink pen, I marked a 5" grid on the quilt top and pin basted the sandwich.
I loaded my Juki with her walking foot and 50wt Aurifil thread #1100 Red Plum.
Then I just put a pink or purple square in the corner of a drawn grid square and stitched from one side of the quilt to the other. I didn't lay out the squares in advance, I just added one as I got to the next spot.
The squares are just left with the raw edges. They will fray slightly when washed, giving a soft texture for the baby to play with.
I stitched two parallel lines on each square to hold them in place while adding more rows. Then once all the rows were attached, I turned the quilt and added lines for the other two sides of each square.
I cut the quilt to 40" square and machine sewed the binding on. The final stitch happened one minute shy of 3 hours from when I started!!
This is the third time I've made a quilt using this technique (see the first one here and the second one here). This is the first time I made it using scraps though. The Accuquilt Go! cutting machine made it SO fast and easy!
I already have another quilt planned using the Accuquilt Go! cutting machine. I am chomping at the bit to try the HST (half square triangle) die!
This was a fun (and fast!) finish! Now it's back to the Market to-do list!
Linking up with What I Made Monday at Pretty Piney, Monday Making at Love Laugh Quilt, Midweek Makers at Quilt Fabrication, Wednesday Wait Loss at The Inquiring Quilter, and Let's Bee Social at Sew Fresh Quilts.
This post contains affiliate links. Clicking a link will NOT affect the purchase price.
__________
If you liked this post, you may also like these:


This is so fun!
ReplyDeleteI love your energy and creativity. Good luck with the last market prep!
ReplyDeleteWow, I will have to remember this if I need a quick finish.
ReplyDeleteCan't go wrong with those vibrant colors! I love it. What a terrific solution for when you're pressed for time. Thanks for linking up to What I Made Monday.
ReplyDeleteGosh that was a quick finish and it looks fabulous. Thanks for the idea :)
ReplyDeleteIt's stunning! I love the saturated colors. It would have been hard for my inner control freak to let go and not lay out the squares in advance, but that saved so much time and it looks amazing!
ReplyDeleteWhat a fun quilt and so fast!! You will love the HST die! I pull my cutter out all the time now for 2 1/2" strips too oh and QST. Lots of great fast solutions with those cutters.
ReplyDeleteWhat a great idea! It looks wonderful. I'll have to remember that technique when I get another longarm someday!
ReplyDeleteWow...it turned out great. Never thought about leaving a raw edge.
ReplyDeleteGreat looking quilt in such a short time. I am sure it will wash beautifully and be so fun for a baby. Good luck with market.
ReplyDeleteSuper cute and super fast! I think I might try this method the next time my son wants to make a quilt with me. It'll be some prep beforehand on my part, but then he can just add in squares and we can sew over them.
ReplyDeleteThat's brilliant! I never would have thought of making a quilt this way, but it's so cute (and so fast!!).
ReplyDeleteGreat quilt to whip out when in a pinch!
ReplyDeleteOh you are so clever! I was wondering how you got this done so fast. Thanks for sharing on Wednesday Wait Loss.
ReplyDelete