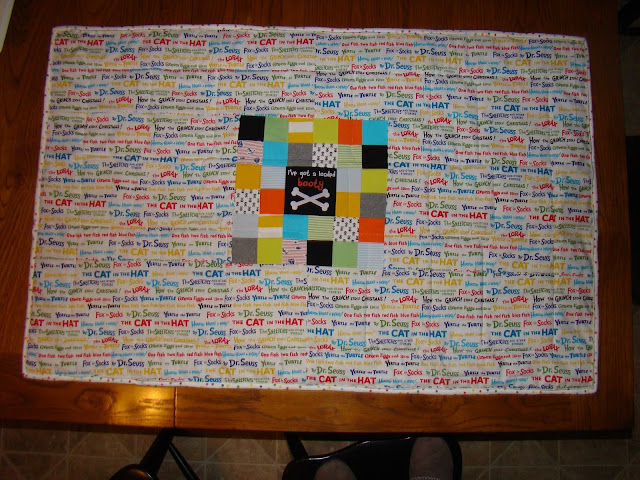
I read up on tutorials for t-shirt quilts and knew I would need to back each clothing item with interfacing to keep it from stretching. I couldn't find exactly which interfacing would work the best, so I picked what I thought would work.
This post contains affiliate links. As an Amazon Associate I earn from qualifying purchases.
If you're new here, hello! I'm Laura! I design quilt patterns, and I'm a self-proclaimed deal hunter! Be sure to join the popular Quilting & Sewing Deals Facebook group where I post sales, deals, and coupon codes from all around the web!
I cut each piece of clothing along the seam lines to get workable pieces that would lay flat and ironed on the interfacing. I thought a great deal about how to arrange the clothes since each was a different size. Some longer, some shorter, all different widths, etc. I finally decided to cut them all into uniform heights, but leave the widths varying. I arranged all the clothes from shortest to longest, then started laying them out to see how many should go into each row. I found that three rows resulted in an almost exact same length for each! I cut each item in each row the same height, then cut each one as wide as possible. I had very little trimming to do to get the rows to be the same length!
I added some polka dot flannel (the same flannel I used for the binding) to frame the name shirt that was in the middle in order to make it the same size as the others in the row. I added a fun Dr. Seuss flannel border to finish the top.
For the back, I cut a square of fabric from the back of each piece of clothing to create a back panel. I used a regular quilting cotton fabric on the back. It has titles of Dr. Seuss books on it. I purchased both Dr. Seuss fabrics from a quilt shop in Branson, MO.
To quilt it, I stitched in the ditch around each shirt from the front. I finished it with a polka dot flannel binding.
Several of the onesies that were used were very well worn and may not hold up to much more wear and tear. Therefore, the quilt is best as a wall hanging instead of one that will be used and abused by a child. The interfacing I used also resulted in the quilt being fairly stiff. This feature doesn't affect it much as a wall hanging, but would not be good if one wanted to curl up with the quilt.
In July (2013), my friend, Kiffany, and her son (now 12 months old) came to visit, and I was able to gift it to her in person!
(Next time, I'm going to try a much lighter interfacing like Pellon 911FF.)
Updated to add: I tried the Pellon 911FF interfacing on this quilt and like it MUCH better!
This post contains affiliate links. Clicking a link will NOT affect the purchase price.
__________
If you liked this post, you may also like these:


No comments:
Post a Comment
Thank you for visiting and for your comments! I try to reply to comments via email, so if you're expecting a response and don't hear from me, check if you're a no-reply blogger. Happy sewing!