This post contains affiliate links. As an Amazon Associate I earn from qualifying purchases.
If you're new here, hello! I'm Laura! I design quilt patterns, and I'm a self-proclaimed deal hunter! Be sure to join the popular Quilting & Sewing Deals Facebook group where I post sales, deals, and coupon codes from all around the web!
Block 8 features two perfectly wrapped presents just waiting for the big day! The block was designed by Sola of Alice Samuel's Quilt Co. You can find the pattern and tutorial on her blog here (sorry, it's no longer available).
My color palette worked really well for this block! I used Moda Bella 98 White for the background, Kona Cactus for one of the presents, Kona Breakers for the other present, and Kona Lipstick for the ribbons.
Just as Sola points out in her tutorial, there are several tricky steps in this block pattern. Be sure to read all the directions for each step before beginning to sew!
Just as with Block 7, I didn't draw diagonal lines when needed, I just used my laser! (Tutorial for adding a laser to any sewing machine here.) When I needed to sew diagonally across a square, I just lined the laser up with the needle, then lined the corners up with the laser line as I sewed!
For the top ribbon, I chose the piecing option in the pattern and decided to show you some tips if you wanted to do it this way too!
When you are ready to add the top ribbon, place your acrylic ruler parallel to the diagonal seam and cut 1 1/4" away from the seam.
Be sure to place the ribbon piece far enough up that both the left and right corners of the ribbon piece extend beyond the top edge of the present.
Sew the ribbon in place and carefully press.
Align your acrylic ruler with the top of the present and trim off the excess ribbon. Trim the bottom of the ribbon in the same way.
To line up the right of the present top, place right sides together and offset the pieces as shown. They should be offset so that your 1/4" seam begins and ends exactly in the inside corner of the offset.
This ensures that the top horizontal ribbon looks like one straight ribbon.
It will appear that the ribbons don't align with the bottom of the present piece, but this is correct! Be sure to follow the trimming directions in the pattern. When sewing the top of the present to the bottom, pin on either side of the ribbons to ensure the best alignment possible. If the ribbons don't line up after sewing, don't be afraid to rip out the seam and try again!
Patience and persistence will pay off in a big way with this block! The block should measure 12 1/2" square.
A peek behind the seams!
I love my blocks all together!
Be sure to check out the other hosts' versions of this block! So many unique variations!
Abbie at Sparkle On
April at JANDA Bend Quilts
Becca at Pretty Piney
Bobbi at Snowy Days Quilting
Diane at Cwilt Fabrics & Haberdashery
Jennifer at The Inquiring Quilter
Karen at Tu-Na Quilts
Laura at Slice of Pi Quilts <-----That's me!
Sandy at Sandy Star Designs
Sherry at Powered by Quilting
Vanda at Quilt in Piece
Remember, you can jump into the QAL at any time! You can always go back and make the previous blocks or just make the blocks that you like! Make a whole quilt using just a single block or make Christmas pillows for the whole family! There will be an amazing grand prize giveaway for those that complete a quilt top using all twelve blocks by January 16th!
Be sure to share a picture of your finished presents block before October 24th to be entered to win prizes! You can post a picture in the Facebook group, on Instagram using #iwishyouamerryqal, or link up to the linky party at the bottom of Sola's tutorial post.
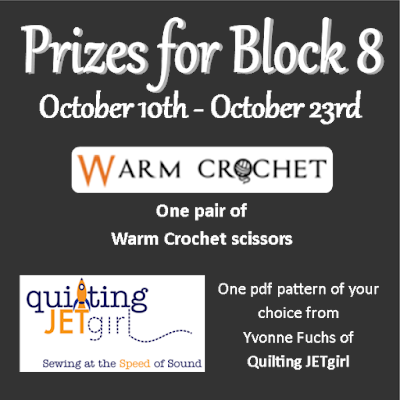
The prizes for Block 8 are a pair of scissors from Warm Crochet in your choice of finish AND a pdf pattern of your choice from Quilting JETgirl! All prizes during the QAL will be open to participants worldwide!
As a bonus, Warm Crochet is offering 10% off your purchase of scissors! Just use the code "ChristmasQAL" at checkout! The code will work until the end of the quilt along!
This post contains affiliate links. Clicking a link will NOT affect the price of the item.
__________
If you liked this post, you may also like these:


Another great version. It is crazy to think we are at block 8!!!
ReplyDeleteOh wow, I love your block and all the wondeful tips! Even I just learnt something new about piecing the top ribbon. I never thought to trim off excess before adding the other side of the piece!
ReplyDeletegreat tips on getting everything squared up properly!
ReplyDeleteI love your blocks too! Great tips for a new Y seamer! I chose to baste when piecing the top to the bottom. I was easily able to adjust before I had serious unpicking to do!
ReplyDelete