At last month's meeting, each 4-Her made one monster block, then I finished the quilt before this month's meeting and documented the whole process in our club's Facebook group so the kids could see what goes on behind the scenes. I revealed the quilt to the kids this week at our monthly meeting, and it was quite a hit!
This post contains affiliate links. As an Amazon Associate I earn from qualifying purchases.
If you're new here, hello! I'm Laura! I design quilt patterns, and I'm a self-proclaimed deal hunter! Be sure to join the popular Quilting & Sewing Deals Facebook group where I post sales, deals, and coupon codes from all around the web!
I first saw this quilt on Pinterest, and knew it would be a great group project! (There's even a BluPrint class for it!) I started by gathering lots of white, gray, and black fabrics from my stash to make the background squares. Next I gathered all the bright solid fabrics I could find in my stash.
I cut all the background square to the size I wanted, then put Lite Steam-A-Seam 2 on the back of the all the bright solids. I also fused white and solid black fabrics and drew circles on them in different sizes for eyeballs and pupils. I drew mouths on another fused black piece.
I also printed out several of the finished quilt pictures I found on Pinterest so the kids would have a reference to guide them in making their own monsters.
The prep work ahead of time meant the kids were able to focus on being creative and making monsters!
Even the parents loved the project and jumped in to help!
After about half an hour, each kid had completed their monster!
After taking the monster blocks home, I adjusted the pieces slightly to account for seam allowances. (Notice the pink monster in the top right corner of the photo above is floating. I moved him down to the bottom of the block.) Then I pressed each block.
The 12 blocks would have made a quilt 30"x40", but I wanted a larger throw size, so I made 18 more blocks.
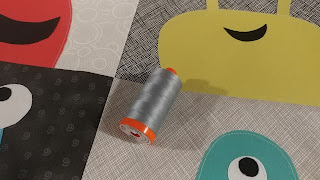
Using Aurifil 50wt Dove #2600, I stitched just inside the raw edges of every monster. I used the same thread to stitch around the eyeballs.
I switched to Aurifil 50wt Black #2692 to stich around all the mouths and pupils.
A peak behind the seams!
Next, I sewed the blocks together to make the quilt top.
I made the back from a striped fabric I've had in my stash for quite a few years.
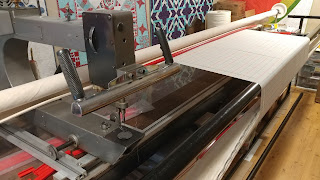
I loaded the backing fabric onto the longarm using my Red Snappers.
Once the backing was loaded, I laid Warm & Natural batting on top.
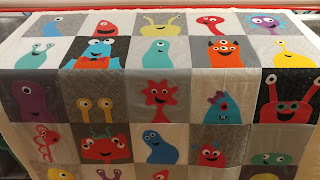
Then I laid the quilt top on the sandwich.
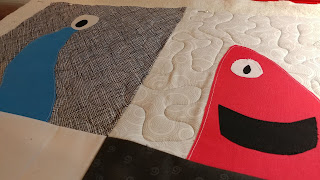
I chose Aurifil 50wt Grey #2605 for the quilting, and I decided I would not quilt over the monsters.
I started to meander on the background fabrics.
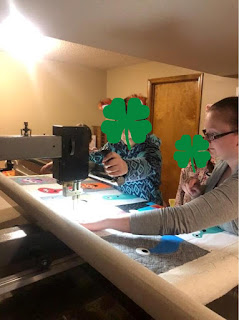
Then I had the girls that are in 4-H Quilting help me quilt a few blocks! (Did I mention that I'm teaching four of our club members to quilt??)
After quilting, I trimmed it up,
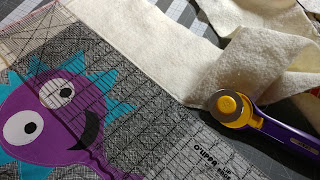
and machine stitched the binding on.
Find the tutorial for sewing binding on by machine here.
The kids loved seeing the quilt for the first time! They each ran up to point out their block!
Linking up with Needle & Thread Thursday at My Quilt Infatuation, Finished or Not Friday at Busy Hands Quilts, Can I Get a Whoop Whoop at Confessions of a Fabric Addict, and Friday Foto Fun at Powered by Quilting.
This post contains affiliate links. Clicking a link will NOT affect the purchase price.
I cut all the background square to the size I wanted, then put Lite Steam-A-Seam 2 on the back of the all the bright solids. I also fused white and solid black fabrics and drew circles on them in different sizes for eyeballs and pupils. I drew mouths on another fused black piece.
I also printed out several of the finished quilt pictures I found on Pinterest so the kids would have a reference to guide them in making their own monsters.
The prep work ahead of time meant the kids were able to focus on being creative and making monsters!
Even the parents loved the project and jumped in to help!
After about half an hour, each kid had completed their monster!
After taking the monster blocks home, I adjusted the pieces slightly to account for seam allowances. (Notice the pink monster in the top right corner of the photo above is floating. I moved him down to the bottom of the block.) Then I pressed each block.
The 12 blocks would have made a quilt 30"x40", but I wanted a larger throw size, so I made 18 more blocks.
Using Aurifil 50wt Dove #2600, I stitched just inside the raw edges of every monster. I used the same thread to stitch around the eyeballs.
I switched to Aurifil 50wt Black #2692 to stich around all the mouths and pupils.
A peak behind the seams!
Next, I sewed the blocks together to make the quilt top.
I made the back from a striped fabric I've had in my stash for quite a few years.
I loaded the backing fabric onto the longarm using my Red Snappers.
Once the backing was loaded, I laid Warm & Natural batting on top.
Then I laid the quilt top on the sandwich.
I chose Aurifil 50wt Grey #2605 for the quilting, and I decided I would not quilt over the monsters.
I started to meander on the background fabrics.
Then I had the girls that are in 4-H Quilting help me quilt a few blocks! (Did I mention that I'm teaching four of our club members to quilt??)
After quilting, I trimmed it up,

cut 2 1/4" binding strips,
and machine stitched the binding on.
Find the tutorial for sewing binding on by machine here.
The kids loved seeing the quilt for the first time! They each ran up to point out their block!
The club plans to donate the quilt locally, but the kids voted at the meeting to wait to donate the quilt so it can be displayed at our county fair in July.
To finish the quilt, I added a label to the back with our club's name and the year.
UPDATE 11/20/19
The quilt received a blue ribbon at the county fair in July. This month, the 4-H club members voted to give the quilt to a local child at Children's Mercy hospital. Earlier this week, several members were able to personally visit a young boy in the hospital and give him the quilt in person!
I'm so glad the 4-H kids were able to have the experience of making the quilt from the beginning to end, and that they were able to put the 4-H pledge into real action!!
"...I pledge my hands to larger service..."
Linking up with Needle & Thread Thursday at My Quilt Infatuation, Finished or Not Friday at Busy Hands Quilts, Can I Get a Whoop Whoop at Confessions of a Fabric Addict, and Friday Foto Fun at Powered by Quilting.
This post contains affiliate links. Clicking a link will NOT affect the purchase price.
__________
If you liked this post, you may also like these:






This is a great project for the kids, and they did a wonderful job!
ReplyDeleteGreat project and they all have done a fabulous job with their monsters. I agree with the kids, it would make a great display at the county fair. Thank You for hosting this week.
ReplyDelete-Soma
OMG what an amazing idea. I can only imagine how excited they were to see their creations brought to life 😍 😍
ReplyDeleteI love you are teaching 4 members to quilt.Great quilt and wonderful idea to teach the club all about quilting. Thank you for hosting the linky party this week.
ReplyDeleteThat is so awesome!!! I bet those kids loved every minute of it !! Hope they have fun displaying it at fair too!! I see a Blue Ribbon in the future!
ReplyDeleteThey must have been so proud to see their quilt! It certainly deserves to be shared at the fair and I hope they all get to see it hanging there :)
ReplyDeleteI love the Monster Quilt! The little quilt makers are quite talented, I'm sure they were delighted to see their quilt and should be very proud of their artwork! Kudos to you for helping them along.
ReplyDeleteYou and all the children did a wonderful job. This would make a great pattern, too.
ReplyDeleteWhat a fun project for the kids! You put a lot of effort in behind the scenes to make this happen, which is wonderful. So, Aurifil 50 works well for longarm quilting? Had not thought to try it but I'll keep that in mind~
ReplyDeleteThis is the most stinkin' cute thing I've seen all week! Great job!
ReplyDeleteLove the monster quilt and great group project.
ReplyDeleteWhat a great project of kids! I love this even to make as a baby quilt! Too cute!
ReplyDeleteThis is such a cool idea! I love that they could make their monsters look however they wanted. And the way steam a seam sticks a little bit before pressing makes it perfect for kids to work with. The different background fabrics were a great idea - that really adds a lot of interest.
ReplyDeleteOh my goodness, this is beyond adorable! And brilliant! Just so I understand (and can potentially shamelessly steal), the ids created their monsters but just the pieces, and you fused them? That's the only part I'm not fully understanding. This is such a great group project. And I love the 4-H clovers as your privacy covers :)
ReplyDeleteWhat a fantastic project! Congrats to all the kids for their finishes.
ReplyDeleteThat is one adorable quilt. So fun.
ReplyDelete