This month, the fabric!
This post contains affiliate links. As an Amazon Associate I earn from qualifying purchases.
If you're new here, hello! I'm Laura! I design quilt patterns, and I'm a self-proclaimed deal hunter! Be sure to join the popular Quilting & Sewing Deals Facebook group where I post sales, deals, and coupon codes from all around the web!
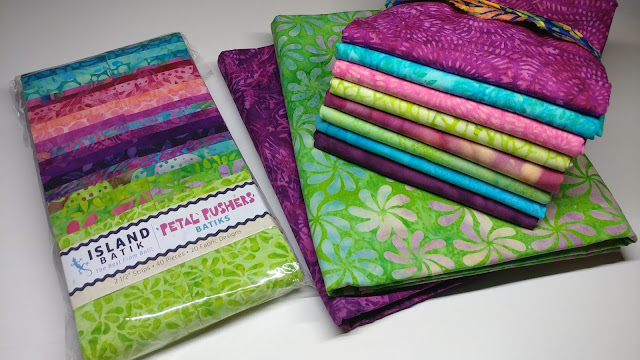
Last month, Island Batik sent me my second box of goodies for the year as part of their Ambassador program (look in the box here). Inside was a pack of 2 1/2" strips from the Petal Pushers line.
I absolutely loved the bright colors, and the pink-teal-purple-green combination is pretty much at the top of my favorite color palette.
Just like "money burning a hole in your pocket," I just *had* to sew with this fabric first!
This month's Island Batik Ambassador challenge was to make a throw sized quilt inspired by "stars."
I designed a few different quilts in EQ8 using the colors, but found the limitation of the 2 1/2" strips to be - well - limiting.
Inspired by this post I found on Pinterest, I finally landed on a design that would work!
I cut the Island Batik solid white into 2 1/2" x 4 1/2" strips and 4 1/2" squares and got to work!
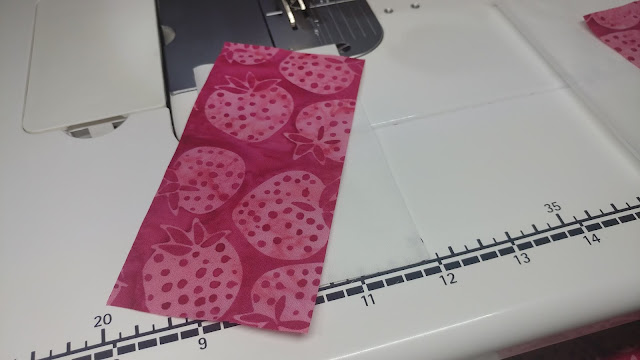
First, I cut through the factory fold of a strip. Then I cut a 2-3" piece off that end, cut it diagonally, and used the four triangles as the four corners on the square. No real measuring. Just eyeballing what would work and sewing it on.
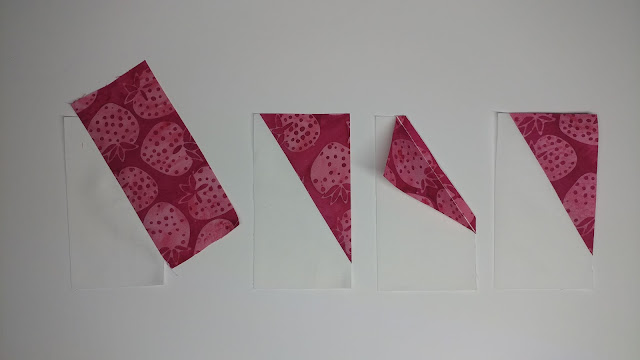
Then I folded the remainder of the strip into fourths, cut through the folds to create eight pieces, then sewed each one onto a background rectangle at an angle.
I completely eyeballed each one, and just alternated between "left" triangles and "right triangles" as I sewed. Here's a look at my process.
After sewing through one strip, I'd have a set of one square with improv corners, four "left" triangles, and four "right" triangles.
From the back side, I used the original white rectangle and square as a guide and trimmed away the excess colored fabric.
Then I folded up the colored fabric and cut away the excess white fabric underneath each triangle.
One strip yielded exactly enough pieces for one improv star.
After finishing a test block, I started chain piecing!
One 2 1/2" strip pack later...
The proof of an improv project - the mess!
After trimming, a quick layout on the kitchen table proved it was going to work!
I put all the pieces up on my design wall (really a cheap flannel backed vinyl tablecloth held up with push pins by my sewing machine).
My cone of Aurifil 50wt #2021 White was perfect for all the piecing!
For the backing, I sewed several strips of the purple and green coordinating fabrics together to get a back that was both interesting and long enough for the quilt top. I layered that with Hobbs Heirloom Premium Cotton batting on my longarm.
After considering several quilting design options (and sleeping on it to further decide procrastinate), I decided to go with small (about 2") swirls as an all-over design. I liked how they contrasted with the sharp points of the stars.
I free-motion quilted the design on my 1989 Gammill longarm using Aurifil #2024 thread. I used the 50wt in the bobbin and the 40wt for the top thread.
I usually quilt quite large designs on my longarm (because they're fast!), but the smaller size of these swirls made for the absolute best quilty texture!
I tried to pick pink for the binding. And green. And purple. Really, I did! But of course the turquoise won. Teal/turquoise/aqua is always the answer!
Two quick victory laps around the edge to machine sew on the binding (tutorial here), and it was ready for some pictures!
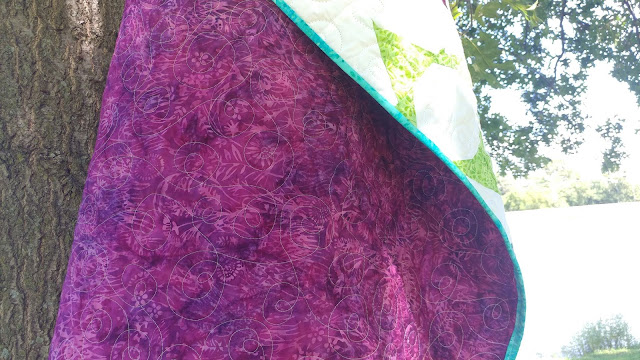
Here's the view from the back. The finished quilt measures 48" x 64" - a perfect throw size!
I love how the swirl quilting shows up on the back too!
Usually, mismatched points and misaligned triangles are like fingernails on a chalkboard to me. But since it was all on purpose, it doesn't bother me one bit!
This was a fun quilt to make! I enjoyed not following the "rules" and not measuring each piece precisely. The relaxed method allowed me to really enjoy sewing with the fabrics!
The finished quilt is bright, colorful, and fun! Exactly the kind of quilt I love to make!
Linking up with What I Made Monday, Monday Making, Modern Patch Monday, Moving it Forward, Design Wall Monday, Colour & Inspiration Tuesday, To-Do Tuesday, Midweek Makers, Wednesday Wait Loss, Needle & Thread Thursday, and Put Your Foot Down.
This post contains affiliate links. Clicking a link will NOT affect the purchase price.
__________
If you liked this post, you may also like these:


I usually feel the same way about improv and mismatched angles, but it really works in this quilt. Your method for getting the most out of a strip was pretty genius :) And I often don't know what to do with a strip pack because I find it so limiting. I have a few just waiting to be used...
ReplyDeleteI adore this quilt! I'm learning to love improv lately, and it is hard! On first looking at your photo on Instagram, I wanted to ask if they were intentionally wonky, but it's like asking if a woman is pregnant! I might have to try this pattern out myself. It's very cool.
ReplyDeleteI love it, especially because if you make a mistake, it won't be a mistake...great quilt...
ReplyDeleteSo fun! I didn't notice the stars were improv until you said something and I looked closer. These fabrics are soooo pretty! I got this line as well and am waiting to find the perfect project to use it in!
ReplyDeleteWell done. It's amazing. I didn't notice mismatched points until you pointed them out.
ReplyDeleteLimiting they are, but you seemed to overcome that in a genius way. Its a fun quilt and really turned out well. I hadn't noticed how different they were....great idea!
ReplyDeleteSuch a fun use of the 2 1/2" strips--and a terrific collection to use! Well done, as always. Thanks for linking up to What I Made Monday.
ReplyDeleteHi Laura, that is a wonderful improv quilt. That's what I'm good at - not measuring! The colour are stunning and the FMQ a lot of fun. I hope you'll link up with Muv on Thursday for Free Motion Mavericks. Congrats!!!
ReplyDeleteThis is really fun and I love how bright the backing is.
ReplyDeleteHi Laura! First, let me say thank you for linking up. I appreciate it so much since I'm new to this whole thing. Those fabrics!! I have to admit that I almost always start with the fabric . . . and then figure out a pattern that appeals and will work. I love those closeups of your quilting - I am definitely going to be PINing some of them. This whole line is gorgeous and I love that stack of goodness just waiting to be placed on your design wall. Just curious - did this pattern use most of the strips? It's nice when it does, although having leftovers is sometimes nice too. ~smile~ Roseanne
ReplyDeleteWhat a fun improv star quilt design! Love the swirly loopy quilting!
ReplyDeleteInteresting. The photo above the Hobbs batting, the top looks like a stained glass window. Not so much into bright colors but I really like it. Thank you for linking up to Put your foot down.
ReplyDeleteYour quilt is beautiful! Thanks for sharing your process.
ReplyDeleteFast quilt! Really enjoyed seeing your process. It's nice to do something improv every once in a while. Thanks for sharing on Wednesday Wait Loss.
ReplyDeleteLove it!! And thanks for sharing your creative steps!!
ReplyDelete