It's 12 days until Christmas, so I thought it would be really fun to share 12 days of handmade ornaments! Every day for the next 12 days, I'll share a tutorial for how to make a fabric ornament!
I'm so excited to share the first ornament with you today!
This post contains affiliate links. If you make a purchase after clicking the links, I may receive a small commission at no extra cost to you. As an Amazon Associate I earn from qualifying purchases.
If you're new here, hello! I'm Laura! I design quilt patterns , and I'm a self-proclaimed deal hunter! Be sure to join the popular Quilting & Sewing Deals Facebook group where I post sales, deals, and coupon codes from all around the web!
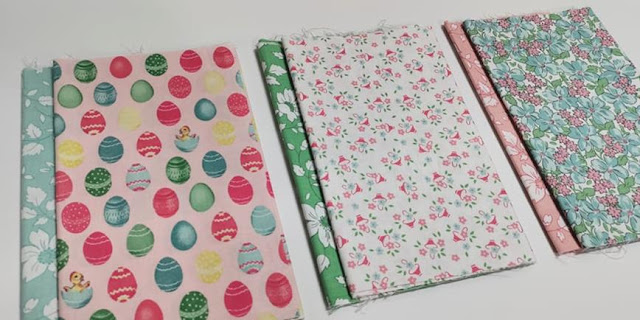
Today's ornament started with this fantastic new collection called Easter Parade designed by Lindsay Wilkes for Riley Blake Designs . I've had my eye on it as soon as it was announced. The collection is inspired by vintage greeting cards and have tiny birds, bunnies, and chicks! It reminds me so much of my grandmother who still sends vintage greeting cards instead of new ones from the store!
When brainstorming ideas of what to make with this collection, I thought about other vintage ephemera, and remembered those 3-D tissue paper decorations! They fold flat, but then you bring the two sides together to make a 3-D basket or egg. Remember those?! I knew that would be so fun to create in fabric form!
I chose sets of two fabrics from the Easter Parade collection. I'm using 1/4 yards, but you could use fat quarters for this too! And I'm using Easter fabric, but of course you could use Christmas fabric!
To make one ornament, you'll need:
(2) fat quarters or quarter yards of fabric
(1) package of Heat-n-Bond Lite
20" grosgrain ribbon (I used 3/8")
(1) wood bead , about 1/2" diameter
Iron (I used my Oliso mini !)
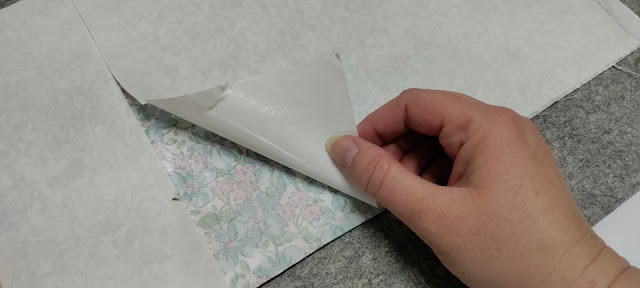
The first step is to make double-sided fabric. To do this, I pressed Heat-N-Bond Lite to the wrong side of one of the fabrics.
Then after peeling off the paper, I pressed a second fabric on top. (I used my Oliso mini iron !)
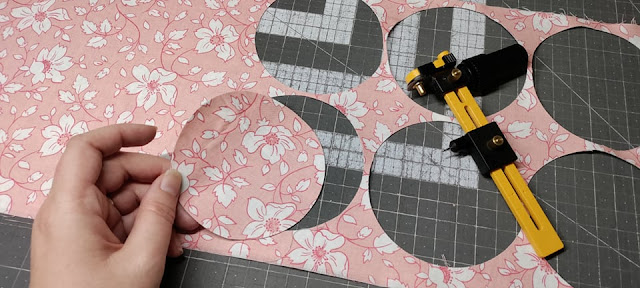
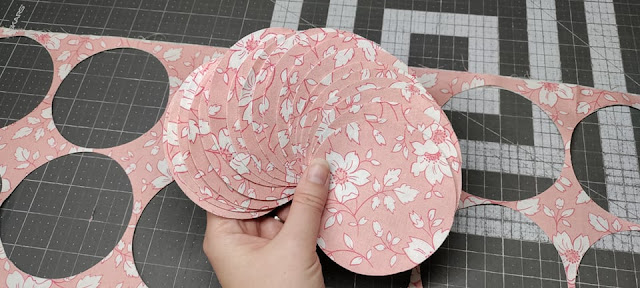
Once cooled, I moved to the cutting mat to cut 4" circles with my Olfa circle rotary cutter .
If you don't have one of these tools, I highly recommend it! It's like a compass from school, except it has a small rotary blade on the end. It cuts perfect circles so much faster than scissors!
You can cut any size from 1 1/2" to 8 3/4". I cut 4" so I could get 20 from a 1/4 yard (or fat quarter) of fabric.
Twenty double-sided fabric circles!
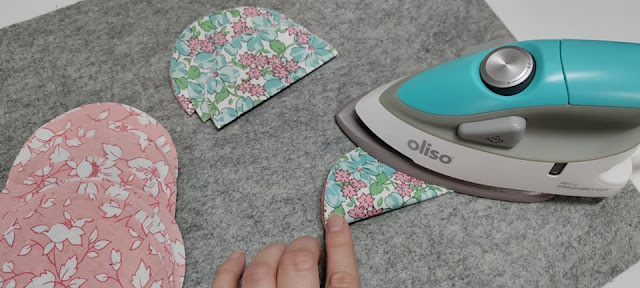
Next, I pressed each circle in half.
Here's where I get to tell you about a failure. I attempted making this ornament with hand sewing, but after failing (twice!), I called my mom for help. She suggested fabric glue, and it was definitely the best choice! Why didn't I call her sooner?!
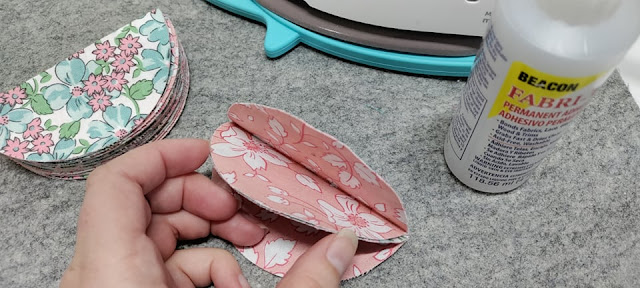
The next step is to glue the whole stack of folded circles together, leaving them stacked on top of each other. This is done by gluing in just two spots along the edge - about an inch from the fold on both sides. I'm using Fabri-Tac glue .
This photo shows the spots where I'm putting glue. Just one little dot in each spot. Once the glue is on and the fabric put together, I pressed it quickly to help set the glue faster.
Here's the whole stack, all circles glued together with just those two dots of glue for each one.
The next step sounds strange, but now glue each folded circle closed with one dot in the center. Just one dot on the edge, press the two halves together, a quick press, then do the next one.
Once you've gone through the whole stack of twenty circles, you'll get to see the magic! Place the top circle and bottom circle together, allowing all the others to fan out to create the ornament. Glue these last two circles together, placing a sewing clip to hold them while they dry. (I couldn't get my iron into this spot easily.) Remember to glue at both of the 1" spots just like you did before.
While the final side is drying, add a dot of glue in-between all twenty of the circles on the ends. After putting the glue on all twenty circles, I held it in place to let it dry for a bit. Sewing clips might work to do it too! Be sure to do the other end too!
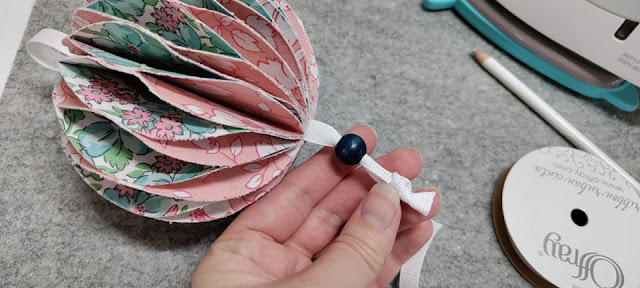
Once all the glue has dried, cut a piece of ribbon about 20" long. Fold it in half, then use a pencil to push the folded end through the center of the ornament.
Feed a wood bead onto the ends of the ribbon. Knot the ribbon and trim the ends.
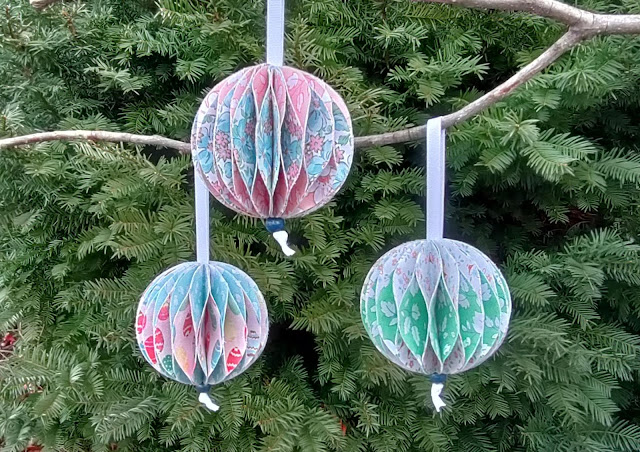
Then repeat to make more - and hang to enjoy!
I LOVE how these turned out!! They look just like the tissue paper decorations I remember, but these will last much longer!
Each one took me about an hour to make. I'm definitely putting these out for Christmas, but I'll get them back out for Easter too! I really thought about making them egg-shaped and still love that idea! I have several fabrics left from the collection, so you just might see that happen in April!
Check out all of the 12 Days of Ornaments tutorials here!
Day 1 - 3-D tissue paper inspired fabric ornaments <---You're here!
__________
If you liked this post, you may also like these:













What a fun ornament, I want to go make some but first I need something to cut all those circles!
ReplyDeleteThank you . Those are so cute .
ReplyDeleteLaura, I can't wait to try these ornaments! I've had that circle cutter for years and never used it, actually I have 2 because I bought it once, forgot and bought it again!
ReplyDeleteOMG, we must be sisters!
DeleteThanks for showing this method of cutting circles, not everyone has an Accuquilt!
ReplyDeleteSo cool, Laura!!! I love your fabric ornaments!!!
ReplyDeleteThank you so much for this excellent tutorial, Laura!
ReplyDeleteThank you! Those are amazing and would make great second gifts as package decorations to be used on the tree year after year.
ReplyDeleteThis comment has been removed by the author.
ReplyDeleteThis comment has been removed by the author.
ReplyDeleteWhat a great idea, thank you! I'll use my Accuquilt to cut the circles.
ReplyDeleteI think I'd use velcro or a snap on the last pair so the ornament could be folded flat for storage between years...
ReplyDeleteThis is awesome. Such a great idea.
ReplyDeleteFabri-Tac is the Bee's Knees! And so is this ornament!
ReplyDeleteIs there a video on this?
ReplyDeleteI have a brief video of me making it on my Instagram! https://www.instagram.com/reel/CXepSfXpC64/?utm_source=ig_web_copy_link
DeleteThank You so much for these idea's they are so cute all of them. Thanks for sharing.
ReplyDeleteMerry Christmas Barb😊♥️