It's Week 2 of the Exploding Heart quilt along! Last week was all about cutting, and this week we will start sewing the blocks! There's a video you can watch this week, and a giveaway at the end of this post!
If you're just joining in, be sure to check out all of the quilt along blog posts:
This post contains affiliate links. If you make a purchase after clicking the links, I may receive a small commission at no extra cost to you. As an Amazon Associate I earn from qualifying purchases.
If you're new here, hello! I'm Laura! I design quilt patterns , and I'm a self-proclaimed deal hunter! Be sure to join the popular Quilting & Sewing Deals Facebook group where I post sales, deals, and coupon codes from all around the web!
**The QAL has ended, but be sure to sign up if you want to be notified about the next QAL!
Week 2 / 6
This week we will begin sewing the blocks. (You have two weeks to get the blocks done!) The directions for the blocks are on pages 3 - 7 of the pattern.
If you don't yet have the pattern, you can purchase the PDF version here.
You can also get a paper version that will be mailed to you.
The pattern includes directions for using an AccuQuilt as well as traditional cutting and sewing. I'll share some tips for both!
Be sure to scroll down past the tips to watch the video and enter the giveaway!
I am using Aurifil 50wt thread for all my piecing. I like to use a neutral color like #2600 Dove or #2310 Beige because I have a light background fabric. Any color will work fine, I just try not to use dark colors with light colored fabric so the thread color doesn't show through the fabric. (This is a great time to use up all those random partially used bobbins!) I sew with a stitch length between 2 and 2.5 on my machine, and chain piece as much as possible!
If you used an AccuQuilt to cut the pieces...
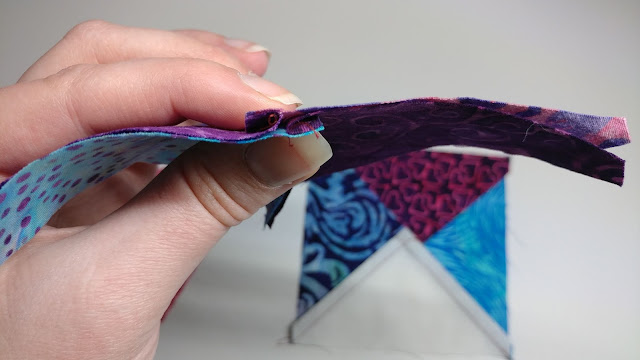
...then you'll be sewing four triangles together to make each block. You can mix your colored triangles up in a box or bag if you want to pick them randomly! I sew sets of two triangles together first, and press each of those seams in opposite directions.
***NOTE: Depending on which version of the pattern you have, the cutting chart for the AccuQuilt on page 2 of the pattern might show an incorrect total triangle count. The total number of triangles needed is 516.
Then I can nest those seams to sew the final seam.
One of the biggest advantages of using an AccuQuilt is that the sewn blocks are the right size and don't need any trimming! Trimming the blocks is next week's quilt along task, so you'll get a free pass! That gives you two weeks to sew the blocks, so don't rush to get them all done this week!
If you are not using an AccuQuilt...
...then you have lots of choices for sewing your blocks! There are tons of inventions and gadgets that can help save you time or be more accurate. These are all optional. I just wanted to show you a few of them in case you want to try something new! ALL of these methods will require the blocks to be squared up to the needed size. I'll give some tips for that next week!
Your first decision is to draw a line or not to draw a line.
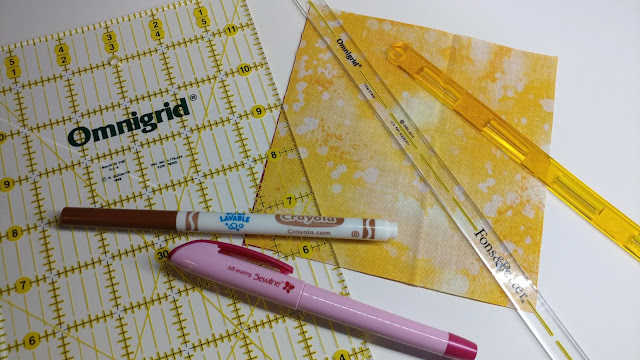
The pattern says to draw a line from corner to corner to begin sewing the blocks. You can use your regular quilting ruler and a pencil, marker , air erasable pen , or any other writing tool for this job. When sewing, align the drawn line with the side of your 1/4" presser foot to sew 1/4" on either side of the line.
There are a special rulers for this job too.
The Fons & Porter Seam Markers are 1/2" wide rulers with a line down the middle. To use this ruler, you draw a line on both sides, then just sew on the lines!
Another similar ruler is the Quilter's Rule Quick Quarter . This ruler is also 1/2" wide, but it has slits down the center so you can draw on either side of the ruler or the center line.
There are even more options if you do NOT want to draw the line!
The simplest method is to use a piece of painter's tape or washi tape on your sewing machine bed. Line the edge of the tape up with the edge of your 1/4" presser foot.
Then keep the bottom corner on the line as the fabric goes through the machine. Flip the square around, and sew again to get both stitching lines needed.
Diagonal Seam Tape uses this same principle, but has a red line that is straight in front of the needle, and 1/4" lines on either side.
You use it the same way as the painter's tape, keeping the bottom corner of the square in line with the black 1/4" line as you sew.
Another product that works in a similar way is the Sew Straight guide by Quilt in a Day .
This guide tapes to your machine bed, and has additional diagonal lines to help you keep your square aligned as you sew.
But my favorite of all of these methods is the laser sewing machine !
The laser shines on top of the fabric instead of getting covered up! Check out this blog post if you want to know more about the laser! If I'm not using my AccuQuilt, then I'm definitely using my laser! (This week's giveaway is a red one! Enter at the bottom of this blog post!)
Whether you use a gadget to sew your blocks or not, you'll have two weeks to get them done. Next week I'll share tips on squaring and trimming the blocks, so try to get them all sewn this week.
I press all of my seams to one side, and nest seams whenever possible.
If you're sewing blocks that have two half-square triangles together, be sure to nest the seam before sewing the other diagonal lines!
And if you're sewing a half-square triangle to a background square, they won't be the same size. Just center the HST on top of the square, then sew.
Video
Want to see all these tools in action? Check out this week's video!
**If the video doesn't load, you can watch it here: https://youtu.be/PHzWNBpPoRM .
Homework
- Sew all of the blocks. Refer to pages 3-7 in the pattern.
- Share a photo of your stack of blocks on social media so we can encourage you! Use #explodingheartQAL in the caption of your photo on Facebook or Instagram. On Facebook, you can share on your personal timeline, or you can share in a quilting group you're in! If the post is "public," then others sewing along will be able to find it and encourage you!
- Search for #explodingheartQAL on Facebook or Instagram, and like and comment on at least three posts to encourage others that are sewing along!
- Enter this week's giveaway at the end of this post!
QAL Schedule
Next week, I'll be sharing tips for trimming and squaring the blocks!
GIVEAWAY
Jeanne was last week's winner of an Oliso Mini Iron ! Congratulations, Jeanne!!
Now for this week's giveaway! There will be a giveaway every week of the quilt along! This week's sponsor is ViviLux, who is giving away one Red Sewing Machine Laser ! Enter using the rafflecopter below.
Let's all quilt along!
__________
If you liked this post, you may also like these:
Disclaimer: Giveaway is in no way sponsored, administered, or associated with Blogger. By entering, entrants confirm they are eligible to win. No purchase necessary to win. Open to US residents aged 18+. Giveaway starts at 12:00am CST January 14, 2021 and ends at 12:00am CST on January 21, 2021. One winner will receive a Red ViviLux Sewing Machine Laser (value of approximately $60). Odds of winning determined by number of eligible entries received. How to enter: complete a task on the Rafflecopter widget. Winner will be chosen by Rafflecopter on January 22, 2021 from all eligible entries and notified by email. If winner cannot be reached via email or prize is unclaimed after three days, a new winner will be chosen by Rafflecopter. Winner is responsible for paying any taxes related to the prize. By entering this giveaway, you release Slice of Pi Quilts from any liability whatsoever. Void where prohibited by law.


Still haven't finished cutting all the background (waiting for fabric) so let's hope USPS is faster than pre-Christmas! :)
ReplyDeleteAgreed. I'm waiting for my FQs to be delivered.
DeleteI'm still cutting too!!! 🙃
DeleteWhy am I unknown???
DeleteJust got my pattern in the mail yesterday, so I am WAYYYYYYYYY behind. Will cut today, sew tomorrow and by next week, hopefully, be caught up! This is a beautiful pattern. Thank you for hosting a sewalong! Blessings from West Virginia.
ReplyDeletePlenty of time to catch up!
DeleteYay! I think I mastered the drawing! I love my Accuquilt for cutting triangles. This is the perfect pattern for an Accuquilt and I really appreciate the Accuquilt specific directions!
ReplyDeleteVery helpful. I use the fonts & porter ruler
ReplyDeleteI’m using my red and pink scraps and I think I’m going to love it!❤️
ReplyDeleteI am eager to see your quilt of pink and red!
DeleteMy fabrics and blo-loc ruler have shipped. Hope to get going on this project soon.
ReplyDeleteLittle late to the party. I got my FQ cut last night. Sadly I didn’t have enough of my background fabric in my stash. Guess I’ll have to go shopping.
ReplyDeleteGreat tips!! And the pictures really help.
just an opportunity to go shopping !! have fun
DeleteI’m excited to start sewing!
ReplyDeleteI am using the chain method. It moves along quickly.
ReplyDeleteGood idea!
DeleteI have everything cut out and I'm ready to sew! Thanks for the Sew Along.
ReplyDeleteI cant wait to get my pattern
ReplyDeleteIt is a fun quilt for sure, got mine all sewn
DeleteI'm also waiting for background fabrics.
ReplyDeleteReady to sew!! And my daughter is quilting for the first time along with me which is making this quilt special and fun!
ReplyDeleteStill cutting! Can't wait to see the video! LOVE, LOVE this quilt!
ReplyDeleteLove the quilt and excited about QAL
ReplyDeleteI’m anxious to start sewing blocks! I am curious about the pressing the final seam. When sewing the blocks to each other and then the rows it seems like it won’t be possible to nest the seams. Does this create bulk?
ReplyDeleteI wondered about this too.
DeleteThere is a bit of bulk in some of the corners, but I still prefer to nest the seams when sewing the blocks together. You can definitely press the seams open if you prefer that! No rules here! ;)
Deletecool give away
ReplyDeleteWhere can I find the video for Week 2?
ReplyDeleteScroll way down on the blog.
DeleteThe video is at the bottom of the blog post, or you can find it here! https://youtu.be/PHzWNBpPoRM
DeleteI use ruler and chalk methods to mark my blocks
ReplyDeletethats how I marked mine also, gives me something to sew on.
DeleteAccuquilt method!
ReplyDeleteMe too! 🙂
DeleteAhh!! I am so excited to get started! BUTTTT still waiting on both my fabric and pattern!!
ReplyDeleteI'm excited to get started sewing the blocks thanks for hosting this QAL good motivation!!
ReplyDeleteOld school, using ruler, two lines and painter’s tape.
ReplyDeleteI am so excited to start sewing. I am using my accuquilt Ohio Star to cut the triangles.
ReplyDeleteDies arrived this morning. Time to get started!
ReplyDeleteGreat job on the video! Thank you for providing so many options for the techniques.
ReplyDeleteI'm ready to start sewing - I'm so excited and can't wait to finish this quilt. Thanks for having the sew along.
ReplyDeleteJust keep Sewing....( Like Dorie says,,,Just keep Swimming!!)
ReplyDeleteI haven't got all of my background squares cut yet, but I will start sewing with what I have! Great video!
ReplyDeleteAll cut out and ready to sew this weekend (or tomorrow night when I get off from work). Thanks so much for hosting this quilt along and inspiring me to do this quilt!
ReplyDeleteI am using my vintage singer sewing machine to stitch this entire quilt together. She is the straightest and most reliable machine!
ReplyDeleteI love your heart design! I am behind. I need to pull fabrics and get busy. Thank you for this QAL!
ReplyDeleteYou are not too far behind! Good luck.
DeleteI'm probably going to draw a center line and use my quarter inch foot.
ReplyDeleteI'm using the Accuquilt method!
ReplyDeleteI'm not off to a good start. Started on Block B by sewing my background QST together only to realize I was sewing the long sides instead of the short sides. Luckily I had only done 9 units before I realized my mistake!
ReplyDeleteWhen I was cutting my 4.5" squares, my ruler slipped on a group of 4! Luckily, I have enough fabric; so I just had to cut a few more squares. I hope you are able to fix your mistake!
DeleteI love using Cluck Cluck Sew's Diagonal Seam tape. It's a lifesaver!
ReplyDeleteI have been itching to get started on sewing my blocks! However, I wanted to wait for any tips and tricks from Laura, so I decided to use up some flannel and make a few baby receiving blankets while I waited for Laura's video. I have a feeling I will get all the blocks sewed together this week!
ReplyDelete... and I will be drawing my center lines.
DeleteI'm abit behind and haven't started cutting my fabric yet. This might make all of you laugh, but I have to ask if I should or need to starch my fabric before cutting. I'm just getting back into quilting after 25 years and we never used starch way back then. I'm thinking I should since the squares are so small. You're thoughts are much appreciated!
ReplyDeleteI do not use starch, and it has worked fine for me. But I know many people that always use starch! You can try both ways and pick what you like the best!
DeleteHave to finish cutting background and loved using the AccuQuilt to cut triangles! Then time to start sewing...
ReplyDeleteI am loving this sew along, got all my blocks sewn ready for the next step.
ReplyDeleteSew much work too make all the blocks but love watching the colors come together!
ReplyDeleteIm having so much fun, while watching it snow outside, and inside i have little dog ears everywhere, but no vacuum until we are done!
ReplyDeleteThe accuquilt is the bomb when cutting out the pieces! It took me a little more than an hour to cut everything (there’s a lot of pieces)! I’m sewing one part each day.
ReplyDeleteI'm drawing the line on my pieces. Traditional, I know.
ReplyDeleteI'm also cutting as I go. Have finished over a hundred quarter square triangles so far.
I am drawing the line plus using Diagonal Seam Tape. Have 3 sets done so far.
ReplyDeleteDraw diagonal line
ReplyDeleteDrawing the lines on!!
ReplyDeleteI'm going to use one of the tape on guides, I just got it, and i've never tried it
ReplyDeleteI've used the accuquilt dies. It has made this quilt easy to cut out.
ReplyDeleteThe video is at the bottom of the blog post, but you can also find it here! https://youtu.be/PHzWNBpPoRM
ReplyDeleteI am trying to locate the video.
ReplyDeleteOh goodness I’m behind already - still need to cut! Best get busy!!
ReplyDeleteGot my blocks cut
ReplyDeleteI using the old fashion way of marking my hst's. I'm working on this between customer quilt/masks orders. I need to keep my creative juices flowing!!!
ReplyDeleteExcited to find this, now to catch up! Yikes I hope the cutting goes fast so I can catch. I did get my pattern and got it printed. That is a start!
ReplyDeleteRunning a bit behind but planned to get caught up this week!
ReplyDeleteCan't wait to see next weeks video on trimming!
ReplyDeleteI'm confused on making block B. Do we use the 5 1/2" Background square or the 4 1/2". Or is the 4 1/2" background square only used for block A?????
ReplyDelete