Ever since visiting a shop in Annapolis, Maryland that sold tote bags made from sailboat sails, I've wanted to try making one myself! I loved the idea of using something old to make something new!
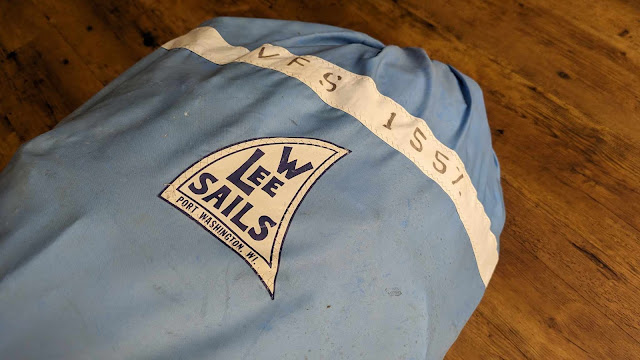
My husband and I recently bought a sailboat to use on our local lake, and we joined the sailing club too. It didn't take long for word to get out that I knew how to sew! Some of our new friends gave me this old and broken sail to use to sew some tote bags!
This post contains affiliate links. If you make a purchase after clicking the links, I may receive a small commission at no extra cost to you. As an Amazon Associate I earn from qualifying purchases.
If you're new here, hello! I'm Laura! I design quilt patterns, and I'm a self-proclaimed deal hunter! Be sure to join the popular Quilting & Sewing Deals Facebook group where I post sales, deals, and coupon codes from all around the web!
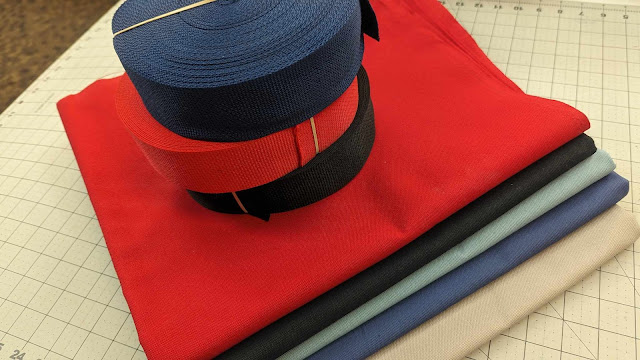
I had no idea how big the sail would be, so I didn't know how many tote bags it would make. I ordered 25 yards of 2" wide webbing in three different colors (red, navy, and black) to use for the handles, and I bought 1 1/2 yards each of five different colors of duck canvas (red, black, light blue, dark blue, and tan).
Then a couple weekends ago, I went to a quilt retreat and took this along as one of my projects to work on there. I knew there would be a large space available to spread out the sail and work, so it was the perfect time!
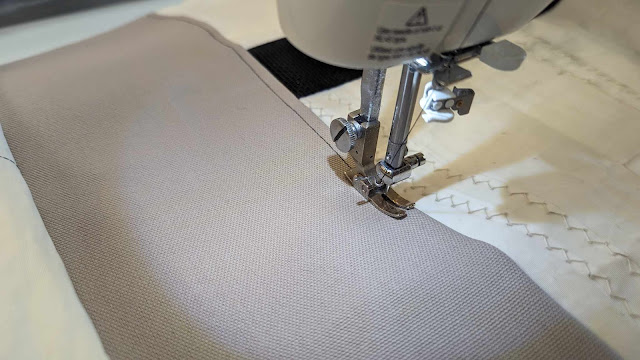
I'll also note that I do not have a Sailrite sewing machine (yet!). Sailrite machines are made to sew sails, but I was confident my Juki would be able to sew it too!
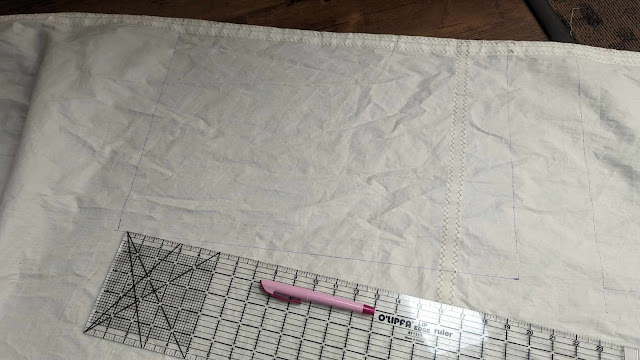
I watched this YouTube video as a tutorial, then got to work! I drew a rectangle onto the sail using my favorite air erasable pen, then cut it out with scissors.
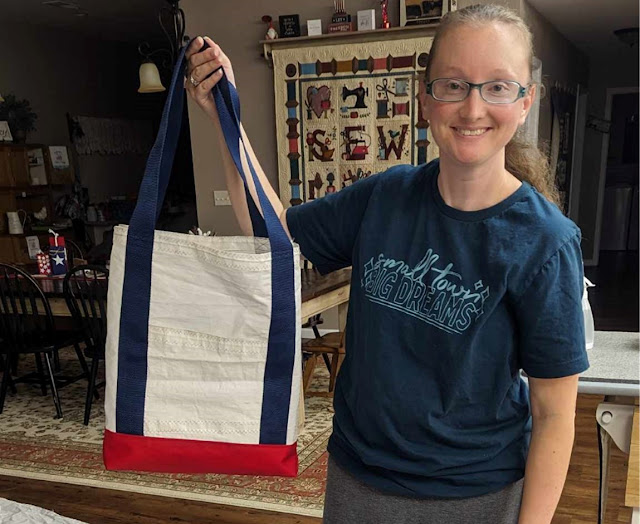
Here is the result of that first bag! I learned so much from this one! It was a wonderful video tutorial, and I liked the sewing method very much. However, I wanted to change up the measurements to make a second one.
I liked the size and shape of the second bag much better!
So then I started cutting all the pieces from the sail, duck canvas, and webbing for as many bags as I could.
For one bag, I cut two 13" x 24" rectangles and one 8" x 10" rectangle from the sail, one 13" x 24" rectangle from the duck canvas, and two 52" long pieces of the webbing.
I kept cutting until I couldn't get even one more piece cut from the sail. It was enough pieces for 42 tote bags!! I had no idea I'd get that many! (And I really hope they weren't hoping to get that sail back!)
Since I didn't know how many tote bags I'd be able to make, I only had enough webbing to make 24 bags. I laid out all the pieces for those 24 bags, mixing and matching the canvas and webbing for lots of different colors combinations.
A polyester thread would probably be the best choice in this situation, but I only had 50wt Aurifil thread with me, so that's what I used, and it worked great! I matched the thread color to the webbing color, and I sewed all the bags with black webbing all at the same time. (Then the ones with navy webbing, then the bags with red webbing.)
I was able to cut several of the pieces from the edge of the sail, meaning it was already hemmed and ready to use. But many of the pieces came from the center of the sail, so I folded one long edge over twice and hemmed it. (For both of the bag pieces and the pocket.)
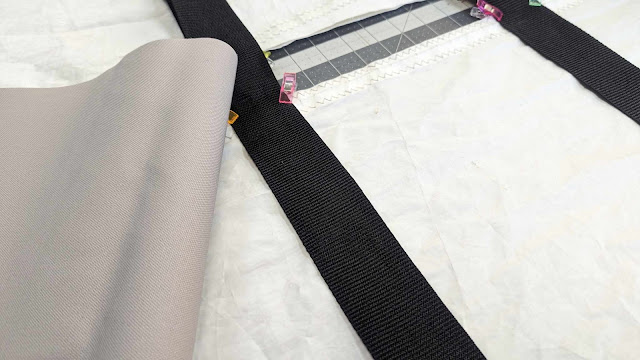
I placed the pocket in the center of one side, then I used sewing clips to hold the webbing and pocket in place. (In the tutorial video, they used staples, but I found that the sewing clips worked just fine!) I spaced the ends of the webbing about 8" apart. I made sure the webbing covered the sides of the pocket and that the ends were spaced exactly the same on both the bag pieces. Oh, and I made sure the straps weren't twisted. My large cutting mat worked well for this step.
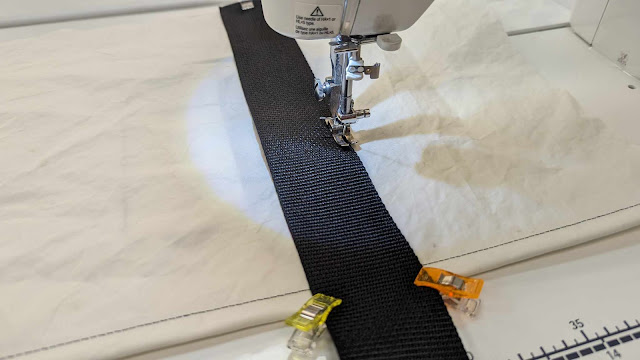
Then I just used a straight stitch to sew from the bottom of the strap to the top, then I sewed an X at the top for extra reinforcement of the stitches before sewing back down the other side.
After just a few bags, I was able to sew pretty fast!
Hem pieces if needed, sew on the straps, sew the sides and bottom together, top-stitch, sew up the sides, turn right sides out, done!
Each bag took me exactly 30 minutes to sew. The only way I could sew it in less time was when my mom helped me clip the pieces, because I could sew while she prepped the next bag. (And this doesn't take into account the hours of cutting I did!)
I typically do not enjoy 3-D sewing, but this was fun to sew! Each one was so satisfying to finish!
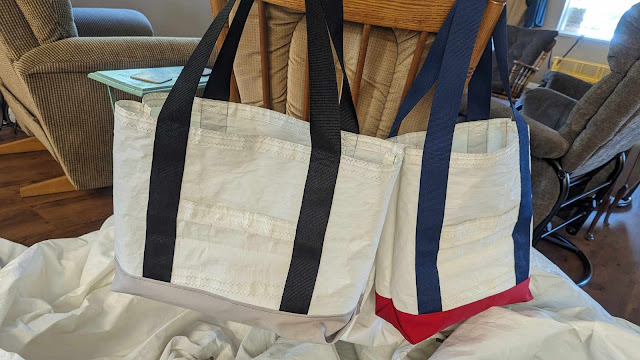
The photo above shows the side of the bag with the pocket, and the photo below shows the other side of the bag.
This is my favorite detail! The way this bottom corner is sewn is brilliant! So simple, yet so effective!
Here's a look inside the bag. The edges are just raw (no French seams, though I did consider that). And if you look carefully at the bottom corner, you'll see how the inside of that triangle corner ends up. It's a bit of clever origami!
Here's a look at one of the bags where I cut the pieces from the edge of the sail, so the edges were already finished without me hemming them.
And I still have about 20 more bags to sew once I get more webbing!
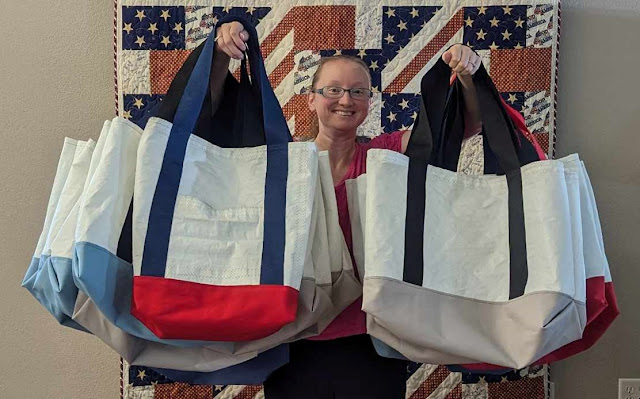
Here I am holding all 24 bags that I sewed at the quilt retreat weekend!
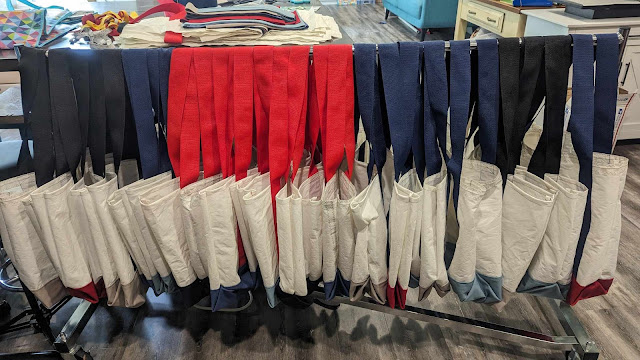
And here are the same 24 bags on a garment rack once I got home! (You can see the pile of cut pieces for the other 20 on the table behind them!)
These were such fun to sew, and I can't wait to share them with our local sailing friends! I have listed a few of the extras in my Etsy shop too!
I'm a bit worried that this will really give me a reputation at the sailing club! I'm thinking repairing sails is a lot like hemming pants! Ha!
__________
If you liked this post, you may also like these:









The bags are great! I'll watch for them in your Etsy shop! Margie \TN
ReplyDeleteBeautiful Bags! I am amazed at the items you can get done. I need to get moving on my sewing. Kathy R. NJ
ReplyDeletethat is amazing. I love that you repurposed the sail. I just love these kind of projects.
ReplyDeleteAmazing, Laura! I can't believe how many you've already made! I live in Maine and you should check out seabags.com in Portland (Maine) to see all the varieties of bags they make from sails. You might find even more inspiration for the next sail that comes your way :)
ReplyDeletehow did you do the bottom corners?
ReplyDeleteGreat job, Laura! These bags look wonderful. I’ll be watching your Etsy shop to see if any are left.
ReplyDeleteSign up for newsletter via About Me link is broken
ReplyDeleteLaura, Great job as always! I love your bags & all of your techniques! So neat the re-purposing! Happy stitches
ReplyDeleteHope you see this comment.
ReplyDeleteI too am a sailor and quilter! I make bags from old sails and use leftover quilt binding to cover the raw edges in the bags. Those edges of cut sails can be sharp. It also adds a pop of color.