It's Week 2 of the Exploding Heart quilt along! Last week was all about cutting, and this week we will start sewing the blocks! I've linked to the video for the week at the end of the post if you'd rather watch instead of read!
If you're just joining in, be sure to check out the other quilt along blog posts:
This post contains affiliate links. If you make a purchase after clicking the links, I may receive a small commission at no extra cost to you. As an Amazon Associate I earn from qualifying purchases.
If you're new here, hello! I'm Laura! I design quilt patterns , and I'm a self-proclaimed deal hunter! Be sure to join the popular Quilting & Sewing Deals Facebook group where I post sales, deals, and coupon codes from all around the web!
If you want to get the QAL emails each week, be sure to sign up here!
Week 2 / 6
This week we will begin sewing the blocks. (You have two weeks to get the blocks done!) The directions for the blocks are on pages 3 - 7 of the pattern.
If you don't yet have the pattern, you can purchase the PDF version here .
You can also get a paper version that will be mailed to you here.
The pattern includes directions for using an AccuQuilt as well as traditional cutting and sewing. I'll share some tips for both!
Be sure to scroll down past the tips to watch the video!
I am using Aurifil 50wt thread for all my piecing. I like to use a neutral color like #2600 Dove or #2310 Beige because I have a light background fabric. Any color will work fine, I just try not to use dark colors with light colored fabric so the thread color doesn't show through the fabric. (This is a great time to use up all those random partially used bobbins!) I sew with a stitch length between 2 and 2.5 on my machine, and chain piece as much as possible!
If you used an AccuQuilt to cut the pieces...
...then you'll be sewing four triangles together to make each block. You can mix your colored triangles up in a box or bag if you want to pick them randomly!
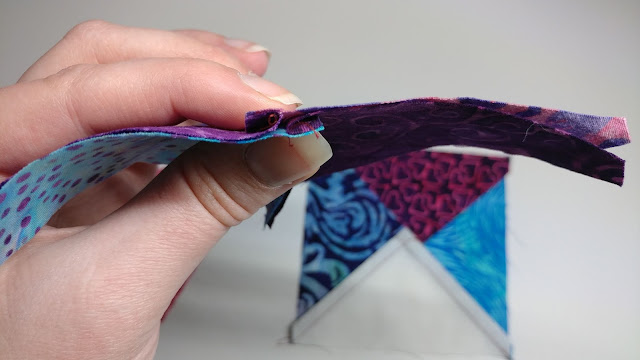
AccuQuilt pieces are cut for sewing with a 1/4" seam. I find it to be slightly larger than what I am used to when piecing, but the pieces have a point to show you exactly where the seam should go. I've drawn the line on the piece above so you can see where I will sew For each block, I sew sets of two triangles together first, and press each of those seams in opposite directions.
Then I can nest those seams to sew the final seam. See how one seam goes left and one seam goes to the right? This lets me butt the seams right next to each other to get a "perfect" point in the middle of the block.
One of the biggest advantages of using an AccuQuilt is that the sewn blocks are the right size and don't need any trimming! Trimming the blocks is next week's quilt along task, so you'll get a free pass! That gives you two weeks to sew the blocks, so don't rush to get them all done this week!
If you are not using an AccuQuilt...
...then you have lots of choices for sewing your blocks! There are tons of inventions and gadgets that can help save you time or be more accurate. These are all optional. I just wanted to show you a few of them in case you want to try something new! ALL of these methods will require the blocks to be squared up to the needed size. I'll give some tips for that next week!
Your first decision is to draw a line or not to draw a line.
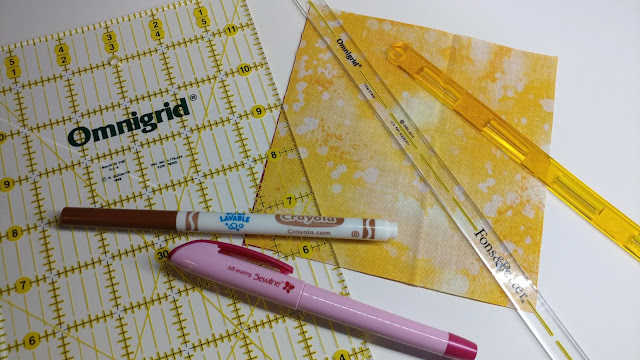
The pattern says to draw a line from corner to corner to begin sewing the blocks. You can use your regular quilting ruler and a pencil, marker , air erasable pen , or any other writing tool for this job. When sewing, align the drawn line with the side of your 1/4" presser foot to sew 1/4" on either side of the line. I find that sewing a "scant" 1/4" works best for me. A scant 1/4" just means about a needle width less than a true 1/4".
There are a special rulers for drawing the lines too.
The Fons & Porter Seam Markers are 1/2" wide rulers with a line down the middle. To use this ruler, you draw a line on both sides, then just sew on the lines!
Another similar ruler is the Quilter's Rule Quick Quarter . This ruler is also 1/2" wide, but it has slits down the center so you can draw on either side of the ruler or the center line.
There are even more options if you do NOT want to draw the line!
The simplest method is to use a piece of painter's tape or washi tape on your sewing machine bed. Line the edge of the tape up with the edge of your 1/4" presser foot.
Then keep the bottom corner of the square on the line as the fabric goes through the machine. Flip the square around, and sew again to get both stitching lines needed.
Diagonal Seam Tape uses this same principle, but has a red line that is straight in front of the needle, and 1/4" lines on either side.
You use it the same way as the painter's tape, keeping the bottom corner of the square in line with the black 1/4" line as you sew.
Another product that works in a similar way is the Sew Straight guide by Quilt in a Day. ( HERE and HERE are two other similar ones!)
This guide tapes to your machine bed, and has additional diagonal lines to help you keep your square aligned as you sew.
But my favorite of all of these methods is the laser sewing machine !
The laser shines on top of the fabric instead of getting covered up! Check out this blog post if you want to know more about the laser! If I'm not using my AccuQuilt, then I'm definitely using my laser! For these blocks, I adjust the laser line so it is aligned with the right side of my 1/4" presser foot. Then I keep the bottom corner of the square in line with the laser as I sew. I also use my laser for patterns with stitch-n-flip corners and haven't drawn lines in years!
Whether you use a gadget to sew your blocks or not, you'll have two weeks to get them done. Next week I'll share tips on squaring and trimming the blocks, so try to get them all sewn this week.
I press all of my seams to one side, and nest seams whenever possible.
If you're sewing blocks that have two half-square triangles together, be sure to nest the seam before sewing the other diagonal lines!
And if you're sewing a half-square triangle to a background square, they won't be the same size. Just center the HST on top of the square, then sew.
Video
Want to see all these tools in action? Check out this video!
**If the video doesn't load, you can watch it here: https://youtu.be/PHzWNBpPoRM .
Homework
- Sew all of the blocks. Refer to pages 3-7 in the pattern.
- If you want, share a photo of your stack of blocks on social media so we can encourage you! Use #explodingheartquilt or #explodingheartQAL in the caption of your photo on Facebook or Instagram. On Facebook, you can share on your personal timeline, or you can share in a quilting group you're in! If the post is "public," then others sewing along will be able to find it and encourage you!
- Search for #explodingheartquilt or #explodingheartQAL on Facebook or Instagram, and like and comment on at least three posts to encourage others that are sewing along!
QAL Schedule
Week 3 - January 20th - Continue sewing the blocks and trimming them
Week 4 - January 27th - Sewing the rows
Week 5 - February 3rd - Sewing the top
Week 6 - February 10th - Quilting and finishing
Next week, I'll be sharing tips for trimming and squaring the blocks!
Let's all quilt along!
__________
If you liked this post, you may also like these:


got everything cut finally!
ReplyDeleteIn block C are we to match the colors of the patterned fabric or mix them up when sewing the 2 HSTs together?
ReplyDelete