Welcome to Week 1 of the Exploding Heart quilt along! I am SO excited that so many of you are going to be quilting along with me - again!
This post contains affiliate links. If you make a purchase after clicking the links, I may receive a small commission at no extra cost to you. As an Amazon Associate I earn from qualifying purchases.
If you're new here, hello! I'm Laura! I design quilt patterns , and I'm a self-proclaimed deal hunter! Be sure to join the popular Quilting & Sewing Deals Facebook group where I post sales, deals, and coupon codes from all around the web!
If you haven't signed up for the Quilt Along emails yet, you can do that here! Each week during the QAL, you'll get an email with a link the blog post and video.
Week 1 / 6
This week we will cut all of the pieces for the quilt top. You can find the sizes and quantities needed on page 2 of the pattern.
If you don't yet have the pattern, you can purchase the PDF version here.
You can also get a paper version that will be mailed to you here.
Before you start cutting, share a photo of your fabrics and the pattern cover on social media so we can ooh and ahh over your choices! Use #explodingheartquilt or #explodingheartQAL in the text of your post so others can like and comment on your post! For this quilt along, I'm using Color Wall fabrics from Riley Blake Designs.
One thing I really love about quilting is that there are so many ways to do the same thing. None of them are right and none of them are wrong. During the QAL, I'll try to show a couple different ways to do each step so you can pick which way you like the most! I'll encourage you no matter which way you do it!
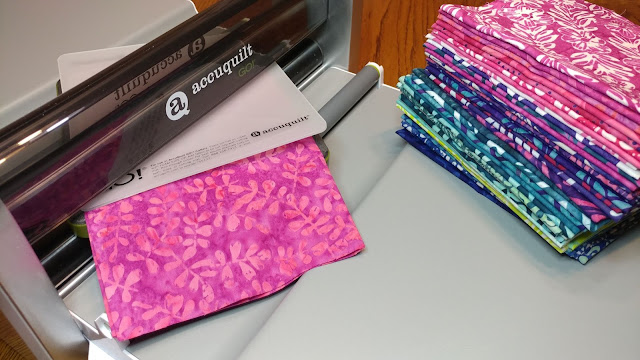
One example of that is that the pattern includes directions for both traditional cutting with a rotary cutter as well as using a fabric cutter. I have an AccuQuilt GO! , so I'll share how I use that for this quilt.
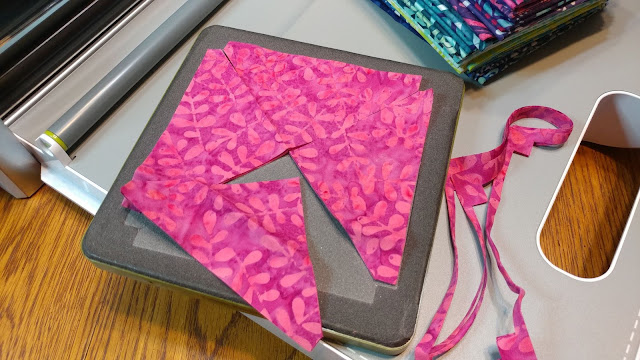
If you're using an AccuQuilt GO! cutter, you can use die #55708 (4" finished square) to cut the background squares, and die #55711 (4" finished quarter square triangle) to cut the triangles. Mine both came in the 8" Qube set . Personally, I prefer to cut the squares with a rotary cutter, but love using my AccuQuilt for the triangles! The AccuQuilt cuts perfectly sized pieces so that once sewn, you don't have to trim the blocks at all! It's a huge time saver!
The AccuQuilt GO! can cut up to six layers of fabric at once. I cut my fat quarters into 6" x 18" strips first, then I take two strips and accordion fold them on top of the die to make six total layers. I put the AccuQuilt cutting mat on top, put it through the cutter, slide the cutting mat off the top, and I instantly have 24 cut triangles!
Here's another tip that I use when cutting out a quilt. I use a Boogie Board to keep track of how many pieces I've cut. Of course paper and pencil work too, but writing it down after each cut really helps to not lose count!
If you're not using an AccuQuilt, you can layer 3-4 fat quarters together on your cutting mat, then cut the squares. There are many ways to cut with a rotary cutter , but I'll share what works for me.
I am right-handed, so I work from the right side of my cutting mat . I lay the fat quarters so they are 18" vertically, and the 21" side is horizontal. I lay the fat quarters just over the 0" line on my cutting mat on the right-hand side, then cut on the 0" line to get a straight edge to start.
I use the markings on my mat when cutting. I find that my Fiskars mat is very accurate, and this method allows me to cut any size I need. I know many people that cut by only using the measurements on their ruler (ignoring the measurements on the mat). Do what works best for you!
Cutting the background fabric can be a bit awkward since it's one piece of yardage instead of fat quarters. A large table (like a dining room table) and a large cutting mat can help. I also like to double my fabric when cutting to make it go faster. To do this, find each end of the yardage and hold the ends together at the factory fold. Line up that factory fold edge as best as you can, then lay it on the cutting mat. The factory fold should be closest to you, along the 0" line on the bottom of the mat. Smooth out any wrinkles and adjust the fabric as needed to keep both folds lined up with the 0" line. Also be sure that all four layers of the cut edges on the right-hand side are just over the vertical 0" line.
Like before, cut on the 0" line to get a straight edge. Make the vertical cuts first, not moving the fabric. I cut several strips, then just fold the extra yardage back out of the way. I walk around to the right side of my table, cut off the selvage edge (usually on the 21" line, but sometimes 20 1/2"), then cut the needed pieces I count these piles by 4s, make a note of the total on my Boogie Board , then gently move the yardage over to the 0" line to cut another set. I be sure to line up the folds along the bottom 0" line again, then cut a tiny bit off the vertical 0" line if needed.
Video
Check out this week's video!
Homework
- Cut all of the background fabric and heart fabric into the sizes and quantities needed. Refer to page 2 of the pattern.
- Share a photo of the pattern cover with your fabric so we can encourage you! Use #explodingheartquilt or #explodingheartQAL in the caption of your photo on Facebook or Instagram. On Facebook, you can share on your personal timeline, or you can share in a quilting group you're in! If the post is "public," then others sewing along will be able to find it and encourage you!
- Search for #explodingheartquilt or #explodingheartQAL on Facebook or Instagram, and like and comment on at least three posts to encourage others that are sewing along!
QAL Schedule
Week 2 - January 13th - Sewing the blocks
Week 3 - January 20th - Continue sewing the blocks and trimming them
Week 4 - January 27th - Sewing the rows
Week 5 - February 3rd - Sewing the top
Week 6 - February 10th - Quilting and binding
Next week, I'll be sharing lots of tips for sewing the blocks. I'll even show you several different methods so you can pick which one you like the best!
Oh, and the blog posts for the QAL will all stay up permanently, so you can come back to them whenever you need to!
Let's all quilt along!
__________
If you liked this post, you may also like these:


Hi Laura. I was surprised that you cut the length of the fabric first. I was always taught to cut the opposite way. Just wanted your thoughts on this. Your way does allow you to cut more squares.
ReplyDeleteI'm not sure I'm understanding your question. Do you mean when I'm cutting the fat quarters? If so, then I'm just doing that to not waste the fabric. I like to keep the scraps!
DeleteThis comment has been removed by the author.
ReplyDeleteHi Laura.
ReplyDeleteCould you use 5" precuts to make the exploding heart and just sub cut the precuts?
The pieces needed are a bit larger than 5", so fat quarters are better for this one.
DeleteThis comment has been removed by the author.
DeleteDo you prepare your fabrics by starching them prior to cutting? thanks....
ReplyDeleteI do not starch my fabrics. Some people love to use starch, so you can if you like!
DeleteWhy do you prefer to cut the squares with your rotary cutter rather than your die?
ReplyDeleteI can cut squares pretty quickly with my rotary cutter, and I don't have much waste at all that way. For me, it's easier to cut yardage with a rotary cutter instead of cutting it into smaller pieces to then run through the AccuQuilt. It's just my personal preference for speed. :)
DeleteI wanted to incorporate some of my husband's shirts and scraps of projects we've made in the past into this, and build around those colours. Will this work? And how large would the scrap have to be to work?
ReplyDeleteI think this sounds like a great idea! I've made a few quilts upcycling clothing. It is more time-intensive to cut, but once you have the pieces, cut, it's no different than any other quilting. Good luck!
DeleteI'm super excited to be sewing along this year, I am off to get some cutting done now!
ReplyDeleteWoo hoo!! I've already got my fabric cut from the last QAL. ha ha ha ha
ReplyDeleteI'm so excited to start this. My pattern arrived today so this weekend I will start choosing my fabrics. I am using up scraps from 2 bins so it may take me a while but I'm okay with that!
ReplyDeleteThank you for the QAL and video. I have had the pattern for some time now, but was a little intimidated but now will be a good time to start.
ReplyDelete